Welcome to the world of shrinking volumes with limited disk space! In this article, we will guide you through the process of reducing the size of your volume, even when faced with the challenge of insufficient disk space. So, grab your tech-savvy mindset and let’s embark on this disk space-saving adventure together!
Reasons for Not Enough Space Available for Shrinking Volume
If you’re experiencing insufficient disk space when trying to shrink a volume, there are a few potential reasons for this issue. Firstly, there may be unmovable files located at the end of the volume that prevent it from being shrunk. To address this, try defragmenting the volume using the built-in Windows Disk Management tool or a third-party partition software like MiniTool Partition Wizard or Paragon Partition Manager. Additionally, make sure that there is enough free space available on the disk to accommodate the desired size reduction. If none of these methods work, you may need to consider alternative solutions such as extending the volume or resizing partitions.
Solutions for Not Enough Space Available on the Disk
- Optimize disk usage: Utilize built-in tools to remove unnecessary files and applications, freeing up valuable disk space.
- Compress files and folders: Reduce file sizes to save space without compromising data integrity.
- Transfer files to external storage: Offload large files or infrequently accessed data to external drives or cloud storage solutions.
- Uninstall unused software: Remove programs that are no longer needed to reclaim disk space.

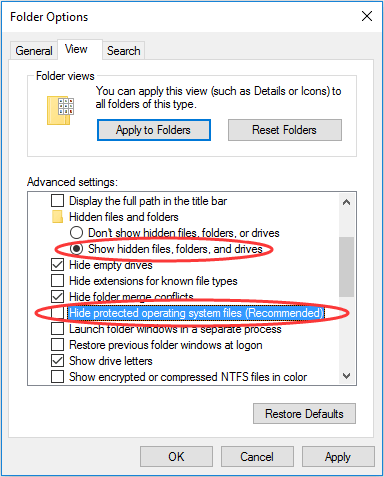
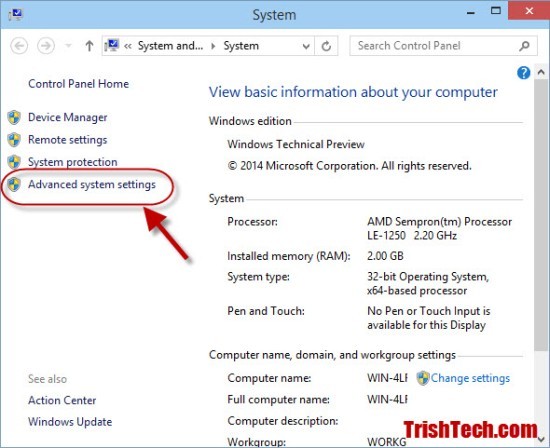
- Move system files: Relocate system files to a different drive or partition to optimize disk space allocation.
- Disable hibernation: Turn off hibernation mode to recover disk space occupied by the hibernation file.
- Clear temporary files: Regularly delete temporary files that accumulate over time, such as browser caches and temporary system files.
- Resize partitions: Adjust partition sizes to redistribute disk space and allocate more storage to the system drive.
- Utilize disk cleanup tools: Take advantage of third-party disk cleanup utilities to efficiently identify and remove unnecessary files.
- Consider upgrading storage: If all else fails, consider adding a larger hard drive or upgrading to a solid-state drive (SSD) to accommodate growing storage needs.

Resolving the Error: Can’t Shrink Volume on Windows 11/10
- Check available disk space
- Disable virtual memory
- Run Disk Cleanup
- Disable system protection
- Disable hibernation
- Run Check Disk utility
- Disable pagefile
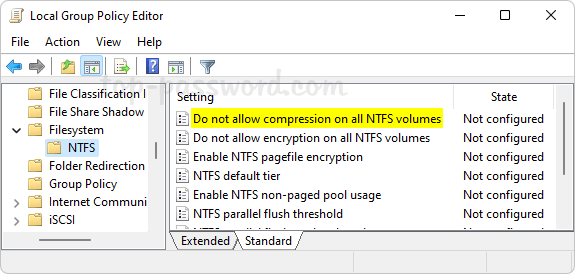
- Disable file compression
- Run Disk Defragmenter
- Disable the pagefile again

- Disable file compression again
How to Shrink Volume Using EaseUS Partition Management Free Tool
To shrink a volume using EaseUS Partition Management Free Tool, follow these steps:
1. Launch the EaseUS Partition Management Free Tool on your laptop or desktop.
2. Select the partition you want to shrink, for example, the C:\ drive.
3. Click on the “Resize/Move” option from the toolbar.
4. In the new window, drag the partition handle to shrink the volume size. You can also enter a specific size in MB.
5. Click “OK” to confirm the changes.
6. Review the changes on the main interface and click “Apply” to execute the operation.
7. Wait for the process to complete, and your volume will be successfully shrunk.
Fixing the Cannot Shrink a Volume Beyond the Point Issue
To fix the “Cannot Shrink a Volume Beyond the Point” issue when shrinking a volume with insufficient disk space, follow these steps:
1. Launch the MiniTool Partition Wizard application.
2. Select the disk containing the volume you want to shrink.
3. Right-click on the volume and choose “Move/Resize” from the context menu.
4. In the pop-up window, enter the desired size for the volume in MB.
5. If the available shrink space is not enough, you may need to use the “Extend Volume” function instead.
6. Apply the changes and wait for the operation to complete.
7. Restart your system and check if the volume has been successfully shrunk.
Frequently Asked Questions: Can’t Shrink Volume on Windows 11/10
If you’re unable to shrink a volume on Windows 11/10 due to insufficient disk space, here are a few steps you can try:
1. Open Disk Management: Press Windows key + X and select “Disk Management” from the menu.
2. Rescan Disks: Right-click on the disk(s) you want to shrink and select “Rescan Disks.”
3. Launch Application: Open a partition software like Paragon Partition Manager or Partition Magic.
4. Shrink Volume: Use the software to shrink the volume by entering the desired size (e.g., 10GB).
5. Extend Volume: If you encounter an error message, you may need to extend the volume before shrinking it. Follow the same steps but select “Extend Volume” instead.