Having trouble with your Windows WiFi connection? Learn how to troubleshoot and fix common issues in this article.
Before You Begin Troubleshooting
![]()
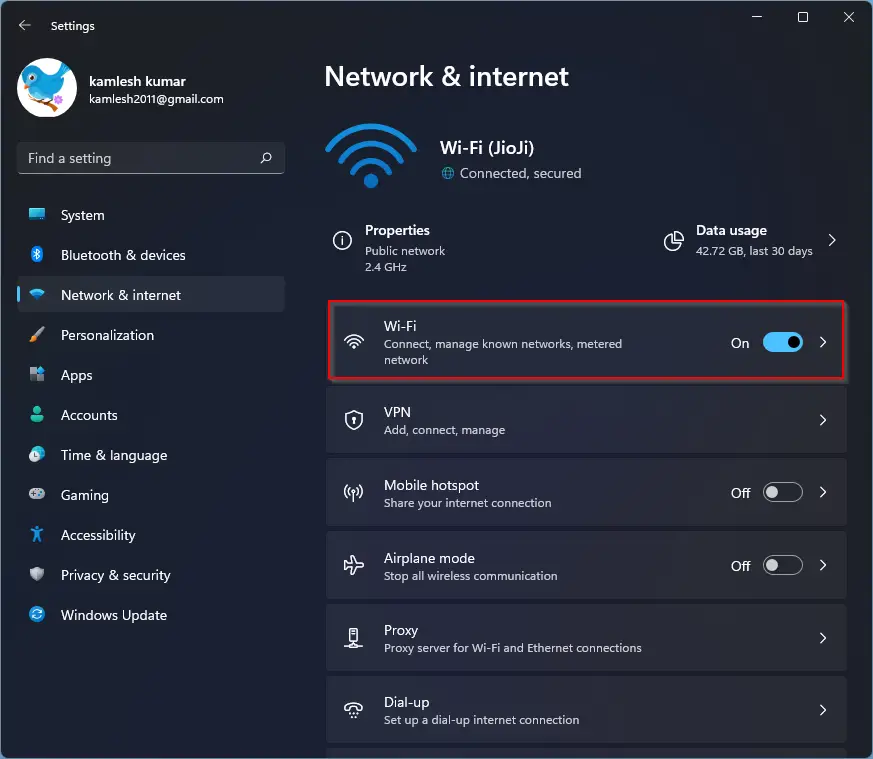
Make sure your Wi-Fi is turned on by checking the taskbar for the Wi-Fi icon. If it is turned off, click on the icon and select the option to turn it on.
Ensure that your wireless router is powered on and functioning properly. Check the lights on the router to confirm that it is receiving power and transmitting a signal.
Verify that you are within range of the Wi-Fi signal. Move closer to the router if you are experiencing connectivity issues.
If you are using a laptop, make sure the Wi-Fi switch or key combination is activated to enable the wireless connection.
Check your network settings:
Right-click on the Wi-Fi icon in the taskbar and select “Open Network & Internet settings.” Click on “Network and Sharing Center” and then “Change adapter settings” to view your network connections.
Make sure that the Wi-Fi network you are trying to connect to is listed. If not, click on “Add a new network” and enter the network name (SSID) and password.
Select the Wi-Fi network from the list of available connections and click “Connect.” Enter the password if prompted and wait for the connection to be established.
If you are still unable to connect, try restarting your computer and router. Sometimes a simple reboot can resolve connectivity issues.
If the problem persists, contact your Internet service provider to ensure that there are no outages in your area or issues with your modem.
Ensure that your computer is not connected to a VPN or proxy server that may be interfering with the Wi-Fi connection.
Initial Steps to Try
- Restart your computer and router:
- Turn off your computer and router.
- Wait for a few minutes.
- Turn on your router and wait for it to fully boot up.
- Turn on your computer and see if the WiFi connection is restored.
- Check your WiFi settings:
- Make sure your WiFi is turned on.
- Check if you are connected to the correct network.
- Verify if the WiFi password is correct.
- Ensure that the network connection is set to automatic.
- Update your network driver:
- Open Device Manager by pressing Win+X and selecting it from the menu.
- Expand the Network adapters section.
- Right-click on your WiFi adapter and select Update driver.
- Follow the on-screen instructions to update the driver.
Updating the Network Adapter Driver
![]()
To update the Network Adapter Driver on your Windows device, follow these steps:
1. Identify the Network Adapter:
– Press the Windows key + X on your keyboard to open the Power User menu.
– Click on Device Manager from the list of options.
– Expand the Network adapters category to view the network adapter installed on your computer.
2. Update the Driver:
– Right-click on the network adapter you want to update.
– Select Update driver from the context menu.
– Choose Search automatically for updated driver software.
– Follow the on-screen instructions to complete the driver update process.
3. Restart Your Computer:
– After updating the network adapter driver, restart your computer to apply the changes.
– Check if the WiFi connection issue has been resolved.
If updating the network adapter driver does not fix the WiFi connection problem, you may need to troubleshoot other areas such as the wireless router, modem, or Internet service provider. Keep in mind that a stable internet connection is essential for a smooth online experience.
Resetting TCP/IP Stack
To reset the TCP/IP stack on Windows for troubleshooting WiFi connection issues, follow these steps:
Step 1: Open Command Prompt as an administrator by searching for “cmd” in the Windows search bar, right-clicking on Command Prompt, and selecting “Run as administrator.”
Step 2: In the Command Prompt window, type the following command and press Enter:
“`
netsh int ip reset
“`
Step 3: Wait for the command to execute and reset the TCP/IP stack. Once the process is complete, restart your computer to apply the changes.
Step 4: After restarting your computer, check if the WiFi connection issue has been resolved. If not, you may need to troubleshoot further or seek additional assistance.
By resetting the TCP/IP stack, you can often resolve connectivity issues and ensure smooth operation of your WiFi connection on Windows.
Temporarily Disabling Firewalls and Antivirus
When troubleshooting WiFi connection issues on a Windows computer, one common step is to temporarily disable firewalls and antivirus programs. These security measures can sometimes block the connection to the network, causing connectivity problems.
To disable the firewall on a Windows computer, you can do the following:
1. Click on the Start menu and type “firewall” in the search bar.
2. Select “Windows Defender Firewall” from the search results.
3. Click on “Turn Windows Defender Firewall on or off” in the left pane.
4. Check the boxes next to “Turn off Windows Defender Firewall” under both private and public network settings.
5. Click “OK” to save the changes.
To temporarily disable antivirus software on a Windows computer, follow these steps:
1. Look for the antivirus program icon in the system tray or open the program from the Start menu.
2. Navigate to the settings or options menu within the antivirus program.
3. Look for an option to temporarily disable the antivirus protection.
4. Select this option and confirm that you want to disable the antivirus temporarily.
Exploring More Solutions
When troubleshooting your Windows WiFi connection, it’s important to explore more solutions if the initial steps did not solve the issue. Here are some additional steps you can take to fix your WiFi connection:
First, try restarting your router and modem by unplugging them from the power source, waiting for a few minutes, and then plugging them back in. This can often resolve connectivity issues by resetting the network connection.
If restarting the router and modem didn’t work, you can try forgetting the WiFi network on your Windows device and reconnecting to it. To do this, go to your WiFi settings, select the network, and choose the option to forget the network. Then, reconnect by entering the password again.
Another troubleshooting step is to update your WiFi driver on your Windows device. You can do this by going to the Device Manager, finding the network adapter, right-clicking on it, and selecting “Update driver.” This can help resolve any compatibility issues that may be causing the connectivity problem.
If updating the WiFi driver doesn’t work, you can also try resetting the network settings on your Windows device. To do this, go to the Settings app, select “Network & Internet,” and then choose the option to reset network settings. This will remove any network configurations that may be causing the issue.
In some cases, interference from other devices on the same WiFi channel can cause connectivity issues. You can use a WiFi analyzer tool to check for nearby networks and switch to a less congested channel. This can improve the reliability of your WiFi connection.
If none of these solutions work, you can try performing a system restore on your Windows device to revert to a previous state where the WiFi connection was working properly. This can help fix any software issues that may be causing the problem.
If all else fails, you may want to consider contacting your Internet service provider for further assistance or replacing your router if it is outdated or malfunctioning. Sometimes hardware issues can be the cause of persistent WiFi connection problems.
Additional Resources for Help
If you’re still experiencing issues with your Windows WiFi connection after following the troubleshooting steps mentioned earlier, there are additional resources available to help you fix the problem.
One option is to check for any available updates for your network adapter. To do this, right-click on the Start button and select Device Manager from the context menu. Look for your network adapter under the Network adapters section, right-click on it, and select Update driver. This will ensure that you have the latest driver software installed, which may resolve any compatibility issues causing your WiFi problem.
Another useful resource is the Windows Network Diagnostics tool. If you’re having trouble connecting to a wireless network, right-click on the network icon in the system tray and select Troubleshoot problems. This will launch the Network Diagnostics tool, which can help identify and automatically fix common connectivity issues.
If you suspect that your router may be the source of the problem, consider resetting it to its factory settings. This can often resolve issues related to network configuration or interference. To reset your router, locate the reset button on the back of the device and hold it down for 10-15 seconds. Your router will reboot and return to its default settings, allowing you to set it up again from scratch.
If you’re still unable to resolve your WiFi connection problem, it may be worth contacting your Internet Service Provider (ISP) for assistance. They can help troubleshoot any issues related to your internet connection or network setup. You can usually find your ISP’s contact information on your monthly bill or their website.
In some cases, it may be necessary to seek professional help from a computer technician. They can diagnose and fix more complex hardware or software issues that may be causing your WiFi problem. Look for a reputable computer repair service in your area to get the assistance you need.
Don’t forget to back up your important files and data before attempting any major troubleshooting steps. This will ensure that you don’t lose any valuable information in case something goes wrong during the process. Consider using an external hard drive, cloud storage, or a USB flash drive to create a backup of your files.
By utilizing these additional resources for help, you can increase your chances of successfully fixing your Windows WiFi connection issue and getting back online quickly and efficiently.
Using Tools for Advanced Troubleshooting
When troubleshooting WiFi connection issues on Windows, it can be helpful to use advanced tools to pinpoint the problem. One useful tool is the built-in Windows Network Diagnostics tool. To access this tool, right-click on the network icon in the system tray and select “Troubleshoot problems.” This will run a diagnostic test to identify and fix any issues with your WiFi connection.
Another useful tool for troubleshooting WiFi connection problems is the Command Prompt. You can use the Command Prompt to reset your network settings by typing “netsh int ip reset” and pressing Enter. You can also release and renew your IP address by typing “ipconfig /release” followed by “ipconfig /renew.” This can help resolve issues with your network configuration.
If you suspect that interference from other devices is causing your WiFi connection problems, you can use a WiFi analyzer tool to identify the best channel for your network. These tools show you the networks in your area and the channels they are using, allowing you to select a less congested channel for your own network. This can improve the performance and reliability of your WiFi connection.
In some cases, outdated or corrupt network drivers can cause WiFi connection issues. To troubleshoot driver problems, you can use the Device Manager tool in Windows. Simply right-click on the Start button, select “Device Manager,” and expand the “Network adapters” category. From here, you can update, uninstall, or roll back your network drivers to see if that resolves the issue.
If you are still experiencing WiFi connection problems after trying these troubleshooting steps, you may need to consider resetting your network settings. To do this, you can use the Network Reset feature in Windows. Simply go to Settings > Network & Internet > Status > Network reset and follow the on-screen instructions to reset your network settings to their default configuration.
In some cases, a simple restart of your computer and network devices can resolve WiFi connection issues. Turn off your computer, modem, and router, wait a few minutes, and then turn them back on. This can refresh your network connection and resolve any temporary issues that may be causing connectivity problems.
If you are still unable to fix your WiFi connection problems using these troubleshooting tools, you may need to contact your ISP for further assistance. They can help you diagnose and resolve any issues with your network connection, or provide recommendations for alternative solutions.
By using these advanced troubleshooting tools, you can quickly and effectively diagnose and fix WiFi connection issues on your Windows computer. Whether you are experiencing slow speeds, frequent disconnects, or other connectivity problems, these tools can help you get back online and stay connected to the internet.
F.A.Qs
How do I fix Windows Wi-Fi connection problems?
To fix Windows Wi-Fi connection problems, you can access the Network troubleshooter by selecting the Start button > Settings > Network & Internet > Status, and then following the steps provided to troubleshoot and resolve the issue.
How do I troubleshoot my computer not connecting to Wi-Fi?
To troubleshoot your computer not connecting to Wi-Fi, you can start by checking for physical connectivity issues, restarting the router and modem, evaluating software problems, checking if you’re within the wireless signal range, ensuring the service isn’t being blocked, opening Windows Network Diagnostics to check your DNS settings, and checking the Wi-Fi adapter.
How to debug Wi-Fi connection issues?
To debug Wi-Fi connection issues, you should begin by checking the essential components of the connection, including power supply, cables, router, wireless adapter, and device settings. Ensure everything is properly connected, turned on, and configured accurately.