The TAP Windows Adapter V9 is a common component used by VPN software to establish secure connections. However, if you no longer require its services or encounter any issues, it may be necessary to uninstall and remove the TAP Windows Adapter V9 from your system. In this article, we will explore the step-by-step process to safely eliminate this adapter, ensuring a seamless experience on your device.
Understanding TAP Windows Adapter V9
To uninstall and remove TAP Windows Adapter V9 from your Windows 10 PC, follow these steps:
Step 1: Open Device Manager by searching for it in the Start menu.
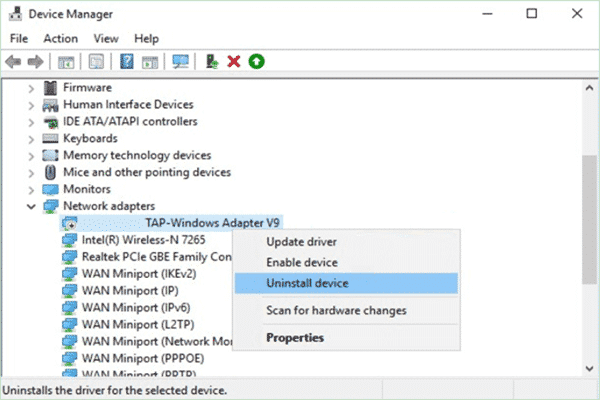
Step 2: In Device Manager, expand the “Network adapters” section to view all the networking devices.
Step 3: Locate the TAP Windows Adapter V9 driver in the list.
Step 4: Right-click on the TAP Windows Adapter V9 driver and select “Uninstall device.”
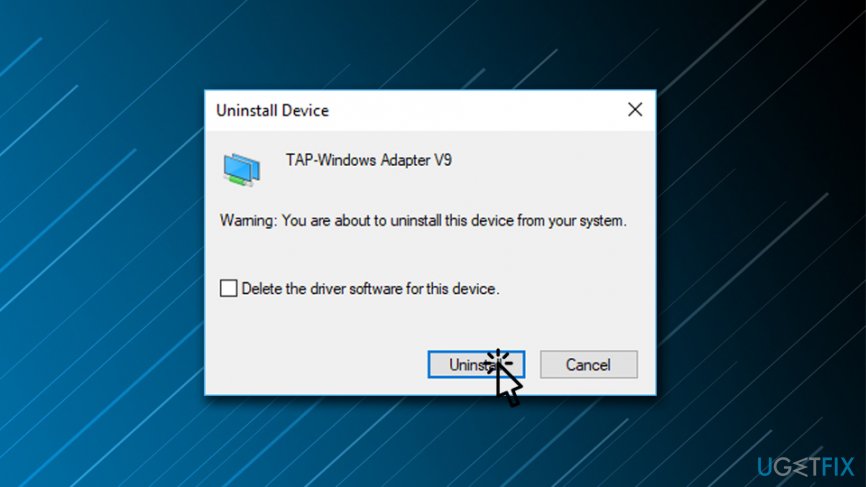
Step 5: In the confirmation window, check the box that says “Delete the driver software for this device” and click “Uninstall.”
Step 6: Wait for the uninstall process to complete.
Step 7: Restart your computer to apply the changes.
Once you have successfully uninstalled TAP Windows Adapter V9, it will no longer be present in your network interface settings. This can help resolve any issues related to VPN software or internet connectivity.
Methods for Removing and Reinstalling TAP-Windows Adapter V9
- Method 1: Uninstall TAP-Windows Adapter V9 using Control Panel
- Method 2: Use Device Manager to uninstall TAP-Windows Adapter V9
- Method 3: Remove TAP-Windows Adapter V9 using Command Prompt
- Method 4: Reinstall TAP-Windows Adapter V9 using OpenVPN installer
- Method 5: Update TAP-Windows Adapter V9 driver
- Method 6: Reset Network Settings to reinstall TAP-Windows Adapter V9
- Method 7: Download and install the latest TAP-Windows Adapter V9 driver manually
Disabling and Enabling the Tap Windows Adapter
To disable or enable the Tap Windows Adapter V9 on your Windows 10 PC, follow these steps:
1. Press the Windows key + R to open the Run dialog box.
2. Type “devmgmt.msc” and press Enter to open the Device Manager.
3. In the Device Manager window, expand the “Network adapters” section.
4. Locate the Tap Windows Adapter V9 in the list of network devices.
5. To disable the adapter, right-click on it and select “Disable” from the context menu.
6. To enable the adapter, right-click on it and select “Enable” from the context menu.
Removing the TAP-Windows Adapter V9 Driver
To uninstall and remove the TAP-Windows Adapter V9 driver, follow these steps:
1. Press the Windows key + X and select Device Manager.
2. Expand the Network adapters section.
3. Right-click on the TAP-Windows Adapter V9 and select Uninstall device.
4. Check the box that says “Delete the driver software for this device” and click Uninstall.
5. Restart your computer to complete the removal process.
Removing the TAP-Windows Adapter V9 driver can help resolve issues with your network interface and improve your internet connectivity. It is especially useful if you no longer use VPN services or have encountered problems with the TAP adapter.
Note: The steps may vary slightly depending on your version of Windows. If you are unsure, consult your system documentation or contact Microsoft support for further assistance.