In this article, I will provide an overview of scanning and disk check techniques for repairing drive issues in Windows 8.1.
Creating a RAM Disk in Mac OS X
To create a RAM Disk in Mac OS X, follow these steps:
1. Open Terminal by navigating to Applications > Utilities > Terminal.
2. Type the following command to create a directory for the RAM Disk:
mkdir /Volumes/RAMDisk
3. Next, create the RAM Disk using the following command:
diskutil erasevolume HFS+ ‘RAMDisk’ `hdiutil attach -nomount ram://204800`
Note: ‘RAMDisk’ can be replaced with the desired name for the RAM Disk, and the number after ‘ram://’ represents the size of the RAM Disk in 512-byte blocks (in this example, it is set to 100 MB).
4. To access and use the RAM Disk, go to the Finder and navigate to the ‘RAMDisk’ folder located in the Volumes directory.
5. You can now copy, move, and delete files on the RAM Disk, just like any other storage device.
Remember that the contents of the RAM Disk will be lost upon restarting or shutting down your Mac, so make sure to back up any important data.
Creating a RAM Disk can be useful for tasks that require fast access to temporary files, such as video editing or compiling large projects. By utilizing your computer’s RAM as storage, you can significantly improve performance.
For more information and advanced techniques, refer to the Apple Support website or consult the official documentation for your specific version of macOS.
Error Checking for Standard Hard Drives in Windows 8
To perform error checking on a standard hard drive in Windows 8, you can use the built-in Error Checking utility. This utility scans the drive for errors and fixes any issues it finds.
To start the error checking process, follow these steps:
1. Open File Explorer by clicking on the File Explorer icon on the taskbar or by pressing the Windows key + E.
2. In File Explorer, locate the drive you want to check for errors. It will typically be listed under “This PC” or “Computer.”
3. Right-click on the drive and select “Properties” from the context menu.
4. In the Properties window, go to the “Tools” tab.
5. Under the “Error checking” section, click on the “Check” button.
6. If prompted, enter your administrator password or provide confirmation.
7. The Error Checking utility will now scan the drive for errors. This process may take some time depending on the size of the drive and the amount of data stored on it.
8. Once the scan is complete, you will see a notification indicating whether any errors were found and fixed. If errors were found and fixed, you may be prompted to restart your computer to complete the repairs.
It is recommended to regularly perform error checking on your hard drives to ensure their health and prevent data loss.
Advanced Error Checking for Hard Drives in Windows 8
To repair your hard drive in Windows 8.1, you can utilize the advanced error checking feature. This feature scans the drive for errors and fixes them automatically. Here’s how to do it:
1. Open File Explorer by pressing the Windows key + E.
2. Locate the drive you want to repair in the left-hand pane of File Explorer.
3. Right-click on the drive and select “Properties” from the context menu.
4. In the Properties window, navigate to the “Tools” tab.
5. Under the “Error checking” section, click on the “Check” button.
6. A dialog box will appear asking if you want to schedule a disk check for the next time you restart your computer. Click “Scan drive” to start the error checking process immediately.
7. Windows will scan the drive for errors and fix them if any are found.
It’s important to note that this process may take some time depending on the size of your hard drive and the number of errors found. It’s best to let the scan complete without interruption.
By using the advanced error checking feature in Windows 8.1, you can easily repair your hard drive and ensure its optimal performance.
python

import subprocess
def repair_drive(drive_letter):
try:
# Prepare the chkdsk command
command = f'chkdsk {drive_letter}: /f /r'
# Run the chkdsk command as a subprocess
subprocess.run(command, shell=True, check=True)
print(f"Drive {drive_letter} repaired successfully.")
except subprocess.CalledProcessError as e:
print(f"An error occurred while repairing drive {drive_letter}: {e}")
# Usage example
drive_to_repair = 'C'
repair_drive(drive_to_repair)
This code defines a function `repair_drive` that takes a drive letter as input and runs the `chkdsk` command with the `/f` (fix errors) and `/r` (recover bad sectors) flags. The `subprocess.run` function is used to execute the command as a subprocess.
Running CHKDSK in Windows XP, Vista, 7, 8, and 10
To run CHKDSK in Windows XP, Vista, 7, 8, and 10, follow these steps:
1. Open the Command Prompt by pressing the Windows key + R, typing “cmd“, and hitting Enter.
2. In the Command Prompt window, type “chkdsk” followed by the drive letter you want to scan. For example, if you want to scan drive C, type “chkdsk C:“.
3. Press Enter to start the scan. CHKDSK will check the drive for errors and attempt to fix them.
4. If the drive is in use and cannot be locked, you will be prompted to schedule a scan for the next restart. Type “Y” and press Enter to schedule the scan.
5. Restart your computer to begin the scan. CHKDSK will run automatically before the operating system loads.
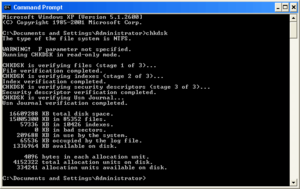
6. During the scan, CHKDSK will display a progress indicator and provide a summary of any errors found. Once the scan is complete, your computer will restart.
7. After the restart, CHKDSK will display a report of the scan results in the Command Prompt window.
Running CHKDSK from Command Prompt
To run CHKDSK from Command Prompt in Windows 8.1, follow these steps:
1. Press the Windows key + X on your keyboard to open the Power User Menu.
2. Select “Command Prompt (Admin)” to open the Command Prompt with administrative privileges.
3. In the Command Prompt window, type chkdsk C: and press Enter. Replace “C:” with the drive letter you want to scan and repair.
4. CHKDSK will start scanning the drive for errors and fixing them if any are found. This process may take some time depending on the size and condition of the drive.
5. Once the scan is complete, you will see a summary of the results on the screen. If any errors were found and fixed, CHKDSK will display a message.
6. You can also use additional parameters with CHKDSK to customize the scan. For example, you can use /f to automatically fix any errors found, or /r to locate bad sectors and recover readable information.
7. After the scan is complete and any necessary repairs have been made, you can close the Command Prompt window.
Running CHKDSK from My Computer

To run CHKDSK from your computer in Windows 8.1, follow these steps:
1. Press the Windows key on your keyboard to open the Start menu.
2. Type “cmd” to search for the Command Prompt application.
3. In the search results, right-click on “Command Prompt” and select “Run as administrator.”
4. A Command Prompt window will open. Type “chkdsk C:” and press Enter. Replace “C:” with the drive letter you want to scan and repair.
5. CHKDSK will start scanning and repairing the drive. This process may take some time depending on the size and condition of the drive.
6. Once the scan is complete, you will see a summary of the results. If any errors were found and repaired, CHKDSK will display the details.
7. You can also use additional parameters with the CHKDSK command to customize the scan. For example, “chkdsk C: /f” will fix any errors it finds automatically.
8. After the scan is complete, you can close the Command Prompt window.
Running CHKDSK can help identify and fix issues with your hard disk drive, such as bad sectors or file system errors. It is a useful tool for maintaining the health and performance of your computer’s storage.
For more information and advanced usage of CHKDSK, you can refer to the Microsoft TechNet website or consult the Windows 8.1 documentation.
Running CHKDSK from the installation disc

To run CHKDSK from the installation disc, follow these steps:
1. Insert the Windows installation disc into your computer’s DVD drive.
2. Restart your computer and boot from the installation disc. This process may vary depending on your computer’s manufacturer. Typically, you’ll need to press a key (such as F12 or Esc) during startup to access the boot menu and choose the DVD drive as the boot device.
3. After the computer boots from the installation disc, you’ll see a Windows Setup screen. Select your language preferences and click “Next.”
4. On the next screen, click “Repair your computer” at the bottom left corner.
5. In the next window, select “Troubleshoot” and then “Advanced options.”
6. Click on “Command Prompt” to open the command-line interface.
7. In the command prompt window, type chkdsk C: /f /r and press Enter. Replace “C” with the drive letter of the drive you want to scan and repair.
8. CHKDSK will start scanning and repairing the drive. This process may take some time depending on the size of the drive and the number of errors found.
9. Once CHKDSK completes, you’ll see a summary of the scan results. If any errors were found and fixed, the drive should now be repaired.
10. Type exit and press Enter to close the command prompt.
11. Restart your computer and remove the installation disc.
Note: Running CHKDSK from the installation disc can help fix issues with your hard disk drive, such as bad sectors or file system errors. It’s recommended to run CHKDSK on a regular basis to ensure the health of your drives and prevent data loss.
Troubleshooting Common Issues with CHKDSK
-
Run CHKDSK Using Command Prompt:
- Press Win+X and select Command Prompt (Admin).
- Type chkdsk C: (replace “C” with the drive letter you want to scan).
- Press Enter to start the scan.
-
Run CHKDSK from File Explorer:
- Open File Explorer by pressing Win+E.
- Right-click on the drive you want to scan and select Properties.
- Go to the Tools tab and click on Check.
- Check the box that says “Scan drive” and click Start.
-
Use CHKDSK with Automatic Repair:
- Restart your computer and press the F8 key repeatedly.
- Select Repair your computer from the Advanced Boot Options menu.
- Choose your preferred language and log in to your account.
- Select Command Prompt from the System Recovery Options.
- Type chkdsk /f /r and press Enter.
Additional Information and Support for Repairing Windows
-
Check for Windows Updates:
- Open the Start menu and click on Settings.
- Select Update & Security.
- Click on Windows Update and then Check for updates.
- Install any available updates and restart your computer if prompted.
-
Run Windows Troubleshooter:
- Press the Windows key + I to open the Settings app.
- Click on Update & Security.
- Choose Troubleshoot from the left-hand menu.
- Select the appropriate troubleshooting option based on the issue you are experiencing.
- Follow the on-screen instructions to complete the troubleshooting process.
-
Use System File Checker (SFC) tool:
- Press the Windows key + X and choose Command Prompt (Admin) or Powershell (Admin).
- Type sfc /scannow and press Enter.
- Wait for the scan to complete and follow any instructions provided.
- Restart your computer after the process finishes.
-
Perform Disk Check:
- Press the Windows key + X and choose Command Prompt (Admin) or Powershell (Admin).
- Type chkdsk /f and press Enter.
- Enter Y when prompted to schedule the disk check at the next system restart.
- Restart your computer and wait for the disk check to complete.
-
Check Hard Drive for Errors:
- Open This PC or My Computer.
- Right-click on the drive you want to check and select Properties.
- Go to the Tools tab and click on Check.
- Follow the on-screen instructions to scan and repair errors on the drive.
-
Reinstall or Repair System Files:
- Insert your Windows installation media (DVD or USB).
- Restart your computer and boot from the installation media.
- Choose your language preferences and click Next.
- Click on Repair your computer.
- Select the target operating system and click Next.
- Choose either Startup Repair or System Restore depending on your needs.
- Follow the on-screen instructions to complete the reinstallation or repair process.