Troubleshooting microphone issues can be a frustrating experience, but fear not! In this article, we will explore effective solutions to fix microphone problems on various devices and platforms, including Windows, Android, HP PCs, Zoom, iPhone, Microsoft Teams, and laptops. So, if you’re struggling with audio glitches during important calls or recordings, read on to discover useful tips and tricks to get your microphone working flawlessly again.
Ensure microphone access for apps
To ensure microphone access for apps on your Windows, Android, HP PC, Zoom, iPhone, Microsoft Teams, and laptops, follow these steps:
1. Open Windows Settings by clicking on the Start menu and selecting the gear-shaped icon.
2. In the Settings pane, click on “Privacy” and then select “Microphone” from the left-hand menu.
3. Make sure the toggle switch under “Microphone Privacy Settings” is turned on.
4. Scroll down and locate the “Allow apps to access your microphone” section.
5. Toggle on the switch next to the apps that you want to grant microphone access to.
6. If you can’t find the app in the list, click on the “Change” button and enable the microphone access for the app.
7. If your microphone is not showing up, right-click anywhere in the “Recording devices” list and select “Show Disabled Devices” and “Show Disconnected Devices”.
8. Right-click on the microphone device you want to use and select “Enable”.
9. Test your microphone by speaking into it and checking the sound bars in the settings.
Troubleshoot low microphone volume or lack of functionality
Troubleshoot Low Microphone Volume or Lack of Functionality:
1. Open Windows’ Settings by clicking the Start menu and searching for “Settings.”
2. In the Settings area, enter “Sound” in the search pane and select “Sound settings.”
3. Scroll down and click on “Sound Control Panel” under the Related Settings section.
4. In the Sound window, navigate to the “Recording” tab.
5. Right-click on your microphone device and select “Properties.”
6. In the Properties window, go to the “Levels” tab and adjust the microphone volume using the slider.
7. Ensure that the microphone is not muted by unchecking the “Mute” box if it is checked.
8. If the microphone is not listed, right-click on the blank area and check both “Show Disabled Devices” and “Show Disconnected Devices.”
9. If your microphone still doesn’t work, update the microphone driver by right-clicking on the microphone device and selecting “Update Driver.”
10. If you’re using a headset or USB device, try connecting it to a different USB port or using a different device.
11. Additionally, check the microphone access permissions for specific apps. Open the “Settings” app, go to “Privacy,” select “Microphone,” and ensure that the microphone access is enabled for the desired apps.
12. For Windows 11 users, follow the same steps as mentioned above, but instead of searching in the Start menu, use the Windows logo key + Enter to open the Settings.
13. If you’re experiencing microphone issues on Android, iPhone, HP PCs, Lenovo laptops, Microsoft Teams, Zoom, or other desktop apps, refer to their respective support pages for specific troubleshooting solutions.
14. Lastly, make sure your device is powered on and has enough battery power for the microphone to function properly.
Others unable to hear in Skype calls
If others are unable to hear you during Skype calls, there are a few troubleshooting steps you can take. First, check that your microphone is set as the default recording device. Open the “Settings” menu on your Windows or Android device and navigate to the “Sound” or “Audio” section. Look for the “Recording” tab and make sure your microphone is selected as the default device.
Next, ensure that microphone access permissions are enabled for Skype. On Windows 10 or 11, go to “Settings” and click on “Privacy.” Then, select “Microphone” from the left sidebar and enable microphone access for Skype. On Android, go to “Settings” and tap on “Apps & Notifications.” Find Skype in the apps list, tap on it, and make sure microphone permissions are granted.
If you’re using a headset or USB microphone, make sure it is properly connected to your computer or device. Check for any physical damage or loose connections.
If the issue persists, try using a different headset or USB device to see if the problem lies with your current microphone.
Set correct microphone access permissions
To set correct microphone access permissions, follow these steps:
1. Open Windows’ Settings by clicking on the Start menu and selecting the gear icon.
2. In the Settings menu, click on “Privacy.”
3. On the left-hand side, click on “Microphone.”
4. Under Microphone Privacy Settings, ensure that the toggle switch is turned on for “Allow apps to access your microphone.”
5. Scroll down and review the apps list. Make sure the apps you want to use with your microphone have permission to access it.
6. If you’re using Windows 11, you can also change microphone access for specific apps by clicking on the “Change” button under “Microphone access for desktop apps.”
7. If you’re experiencing microphone audio issues on specific devices like headsets or USB devices, check their settings and connection.
8. Remember to also check the physical mute button on your microphone or headset, as it may be enabled.
9. Once you’ve made the necessary adjustments, test your microphone to see if the issue has been resolved.
Set default recording device
| Platform | Instructions |
|---|---|
| Windows | 1. Right-click on the volume icon in the taskbar and select “Open Sound settings”. 2. Scroll down to the “Input” section and click on the “Manage sound devices” link. 3. Under the “Input devices” section, select the desired microphone from the list. 4. Click on the “Set as default” button to make it the default recording device. |
| Android | 1. Open the Settings app on your Android device. 2. Tap on “Sound” or “Sound & vibration” (may vary depending on device). 3. Tap on “Audio settings” or “Sound quality and effects”. 4. Select the desired microphone option as the default recording device. |
| HP PCs | 1. Right-click on the volume icon in the taskbar and select “Recording devices”. 2. In the “Sound” window, select the desired microphone from the list. 3. Click on the “Set Default” button to set it as the default recording device. |
| Zoom | 1. Open the Zoom client on your computer. 2. Click on the gear icon in the top-right corner to open the settings. 3. In the settings window, select “Audio” from the left menu. 4. Under the “Microphone” section, click on the drop-down menu and select the desired microphone. 5. Close the settings window to save the changes. |
| iPhone | 1. Open the Settings app on your iPhone. 2. Scroll down and tap on “Sounds & Haptics”. 3. Tap on “Microphone”. 4. Select the desired microphone option as the default recording device. |
| Microsoft Teams | 1. Open the Microsoft Teams app on your computer. 2. Click on your profile picture in the top-right corner and select “Settings”. 3. In the settings window, select “Devices” from the left menu. 4. Under the “Audio devices” section, select the desired microphone from the drop-down menu. 5. Close the settings window to save the changes. |
| Laptops | 1. Right-click on the volume icon in the taskbar and select “Sounds”. 2. In the “Sound” window, go to the “Recording” tab. 3. Select the desired microphone from the list. 4. Click on the “Set Default” button to set it as the default recording device. |
Disable app-exclusive control
To disable app-exclusive control for your microphone, follow these steps:
1. Open the Settings menu on your device.
2. Select the Privacy option.
3. Choose the Microphone tab.
4. Scroll down and locate the “Allow apps to access your microphone” section.
5. Toggle off the switch next to the app that you want to disable app-exclusive control for.
6. Repeat this step for any additional apps you want to disable.
7. Close the Settings menu.
By disabling app-exclusive control, you can troubleshoot and fix microphone issues on various devices such as Windows PCs, Android phones, HP laptops, Zoom, iPhones, Microsoft Teams, and more. This solution should help resolve microphone problems, improve microphone audio quality, and prevent any conflicts between apps accessing the microphone.
Verify hardware compatibility with microphone
To verify hardware compatibility with your microphone, follow these steps:
1. Connect your microphone to your device using the appropriate ports or USB connection.
2. Open the “Settings” menu on your device, and navigate to the “Sound” or “Audio” section.
3. Look for the microphone settings and ensure that it is recognized and selected as the default input device.
4. Test the microphone by speaking into it and checking the audio input levels. Adjust the volume or gain settings if needed.
5. If the microphone is not working or not recognized, try using a different port or USB connection.
6. Check for any driver updates for your microphone or device, and install them if available.
7. If you are using specific applications like Zoom, Microsoft Teams, or Google Meet, make sure to check their audio settings and permissions for microphone access.
8. Consider trying a different headset or USB device if the issue persists.
9. Restart your device to ensure any changes take effect.
Connect Bluetooth headset manually
To manually connect a Bluetooth headset, follow these steps:
1. Turn on your Bluetooth headset and put it in pairing mode. Refer to the headset’s manual for instructions.
2. On your Windows 10 PC, click on the Start button and go to Settings.
3. Select Devices and then Bluetooth & other devices.
4. Make sure Bluetooth is turned on.
5. Click on the “+” symbol next to Add Bluetooth or other device.
6. Select Bluetooth and wait for your headset to appear on the list.
7. Click on your headset’s name and follow any additional instructions to complete the pairing process.
Install appropriate audio driver for computer
To troubleshoot and fix microphone issues on Windows, Android, HP PCs, Zoom, iPhone, Microsoft Teams, and laptops, it is important to ensure that the appropriate audio driver is installed on your computer.
1. Start by identifying the specific microphone problem you are facing.
2. Access the device manager on your computer by pressing the Windows logo key and typing “device manager.”
3. Locate the “Sound, video, and game controllers” section and expand it.
4. Right-click on your microphone device and select “Update driver.”
5. Choose the option to automatically search for updated driver software.
6. If no updates are found, you can visit the manufacturer’s website to download and install the latest driver.
7. After the driver installation, restart your computer and check if the microphone issues have been resolved.
Uninstall microphone from Devices and Printers
- Open the Control Panel by clicking on the Start menu and selecting “Control Panel.”
- In the Control Panel window, locate and click on the “Devices and Printers” option.
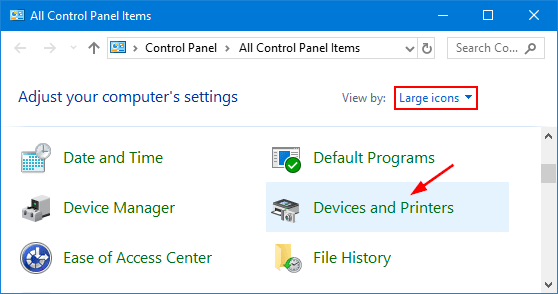
- A new window will open, displaying a list of devices and printers connected to your computer.
- Locate the microphone device that you want to uninstall.
- Right-click on the microphone device and select “Remove device” from the context menu.
- A confirmation dialog will appear, asking if you are sure you want to remove the device. Click “Yes” to proceed.

- Wait for the uninstallation process to complete.
- Once the microphone device has been successfully uninstalled, close the Devices and Printers window.
- Restart your computer to ensure that the changes take effect.
Uninstall suspicious VOIP apps
If you’re experiencing microphone issues on Windows, Android, HP PCs, Zoom, iPhone, Microsoft Teams, or laptops, it’s important to check for any suspicious VOIP apps installed on your device. These apps could be causing conflicts and interfering with your microphone functionality. To troubleshoot this problem, follow these steps:
1. Open the “Apps & Features” or “Settings” menu on your device.
2. Look for any suspicious VOIP apps and select them.
3. Click on the “Uninstall” or “Remove” button to uninstall the app.
4. Restart your device for the changes to take effect.
By uninstalling suspicious VOIP apps, you can eliminate any potential conflicts and resolve your microphone issues.
Perform Windows Update for microphone troubleshooting
To troubleshoot microphone issues on Windows, perform a Windows Update. This ensures that you have the latest drivers and software for your mic. First, connect your microphone to your computer. Go to the Start menu, search for “Windows Update,” and open it. Click on “Check for updates” and let Windows search for any available updates. If there are updates, install them and restart your computer.
This should resolve most microphone problems.