If you’re a Macbook Pro user who’s lost your recovery disk and are worried about losing data, don’t panic. There’s a solution that won’t make you lose any of your valuable information. Read on to find out how to restore your missing recovery disk.
Recovering a Lost MacBook Pro Recovery Disk
If you’ve lost your MacBook Pro recovery disk, don’t panic. There are a few solutions that can restore your missing recovery partition without losing any data.
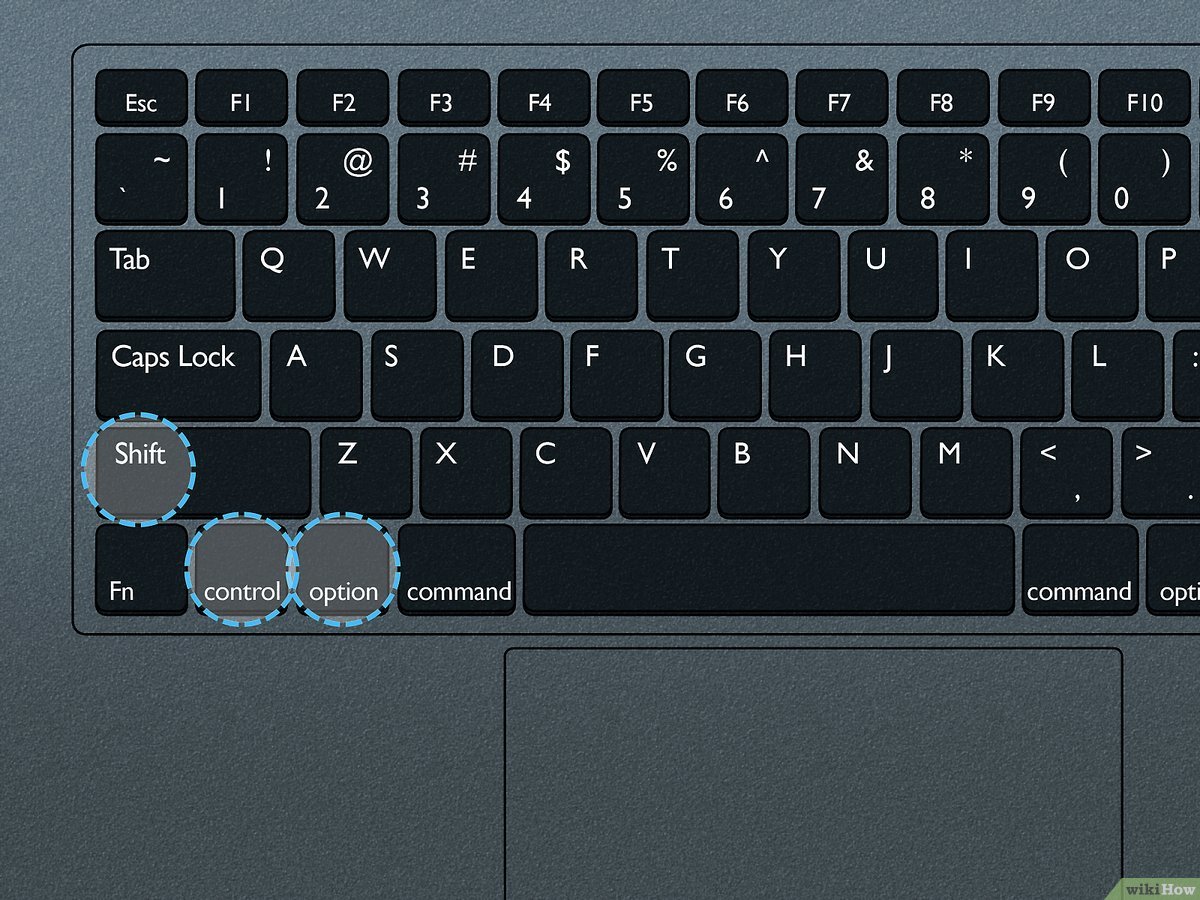
One choice is to use the Internet Recovery feature. Hold down Cmd+Option+R during startup to access it. This will reinstall the macOS version that came with your Mac when it was new.
Another option is to create a recovery partition on your startup drive. Open Disk Utility and create a new partition. Then, download the macOS installer from the App Store and install it on the new partition.
If you have a backup, you can use Time Machine to restore the missing recovery partition. If you don’t have a backup, try using Carbon Copy Cloner to clone your hard drive to an external drive, then reinstall macOS.
In extreme cases, you may need to erase the hard drive and start from scratch. This will cause data loss, so be sure to backup important files first. To erase the hard drive, boot into recovery mode by holding down Cmd+R during startup, then use Disk Utility to erase the drive.
Hopefully, one of these solutions will work for you and restore your missing recovery partition.
Utilizing Time Machine Backups for Recovery
Utilizing Time Machine backups is a great way to recover your Macbook Pro without losing any data. To restore a missing Recovery Disk, first, connect your Time Machine backup and restart your Mac holding down the CMD and R keys. From the window that appears, choose “Restore from Time Machine Backup” and follow the steps. If your Macbook Pro crashes, you can use Time Machine to restore your files and settings. If you encounter problems, try resetting the PRAM or using the diskutil list Terminal command. If all else fails, you can use a thumb drive installer to reinstall macOS Ventura or another version of the operating system. Remember to always make backups in advance to avoid any data losses in case of emergencies.
Creating a Bootable Installer for Recovery
- Download a copy of the Mac operating system from the App Store or from an authorized reseller.
- Insert a USB drive with at least 8GB of storage capacity into your Macbook Pro.
- Launch the Disk Utility app and select the USB drive from the list of available drives.
- Click on the “Erase” button and select the “Mac OS Extended (Journaled)” format option.
- Give the USB drive a name such as “Recovery Installer” and click on the “Erase” button to proceed.
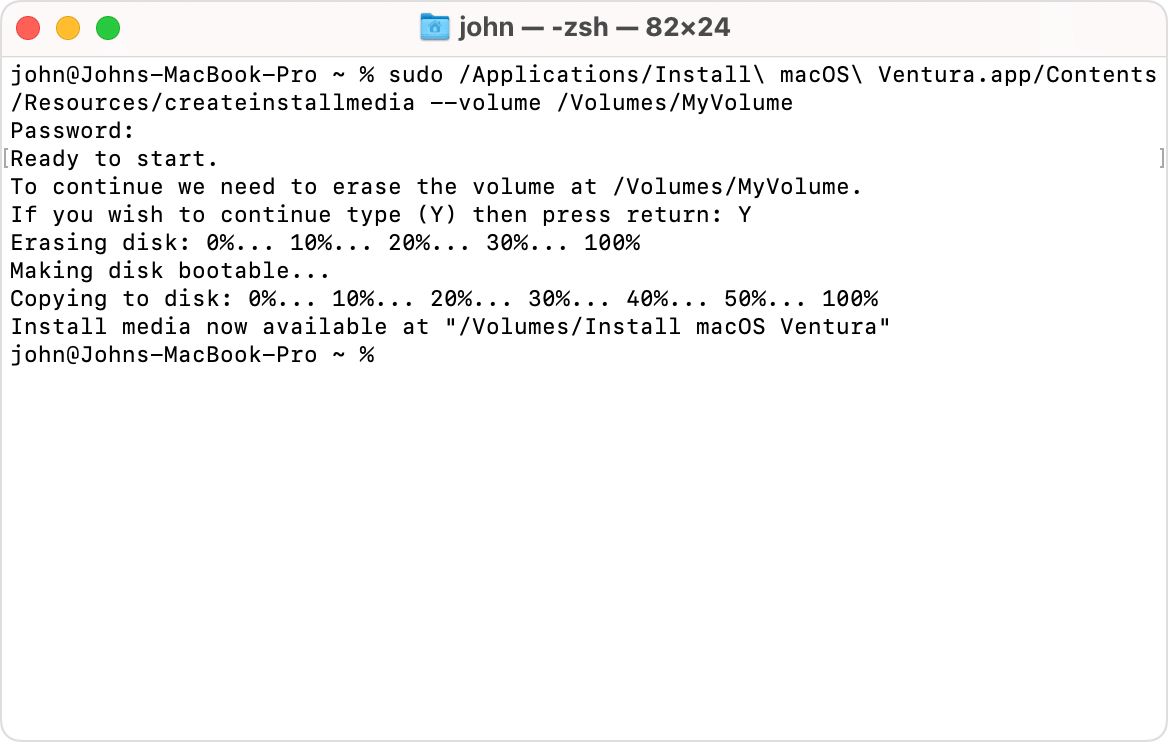
- Launch the Terminal app and type in the command “sudo /Applications/Install\ macOS\ Sierra.app/Contents/Resources/createinstallmedia –volume /Volumes/Recovery\ Installer –applicationpath /Applications/Install\ macOS\ Sierra.app” (replace “macOS Sierra” with the name of the operating system you downloaded).
- Press “Enter” and enter your administrator password when prompted.
- Wait for the process to complete and eject the USB drive.
- You now have a bootable installer for recovery that you can use to restore your Macbook Pro without losing any data.
Accessing Internet Recovery on MacBook Pro
- Shut down your MacBook Pro completely.
- Press the power button and immediately hold down the Command + R keys.
- Keep holding the keys until you see the Apple logo or a spinning globe.
- You may be prompted to choose a Wi-Fi network to connect to.
- Once connected, your MacBook Pro will start up in Internet Recovery mode.
- You will see a macOS Utilities window.
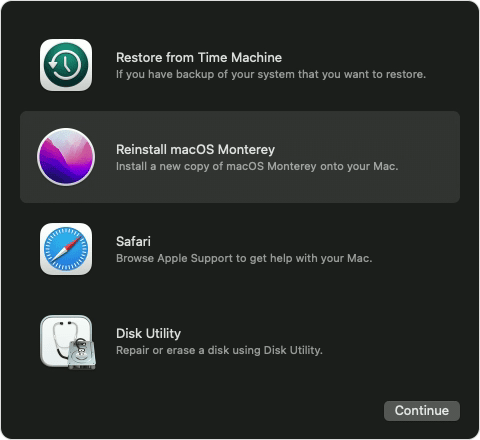
- Select the Reinstall macOS option to restore the missing recovery disk without losing data.
- Follow the on-screen instructions to complete the process.
Installing macOS Versions from Bootable Installer
To restore a missing MacBook Pro recovery disk without losing data, one solution is to install macOS versions from a bootable installer. First, create a bootable installer on a thumb drive using software like DiskMaker X or through Terminal commands found on ChrisWrites.com.
Next, insert the thumb drive into your MacBook Pro and restart the computer while holding down the Option key. Select the thumb drive installer as the startup disk. Choose the macOS version you need and proceed with the installation.
If you have an iMac or another Mac computer, you can create the bootable installer from there. Once the macOS is installed, you can access the Recovery HD partition by holding down CMD + R during startup. Alternatively, you can use Carbon Copy Cloner to copy your hard disk to an external drive in advance.
These workarounds are helpful in case of emergencies, but it’s important to regularly back up your data and check your settings to avoid troubles in the first place.
Troubleshooting Missing Startup Disks on Mac
| Troubleshooting Missing Startup Disks on Mac |
|---|
IssueMacbook Pro recovery disk is missing, and you cannot access the recovery mode. |
Cause
|
Troubleshooting Steps
|
Restoring Missing Macbook Pro Recovery Disk Without Losing DataIf you cannot access the recovery mode, you may need to reinstall macOS. However, this can result in the loss of data on your Mac. To avoid this, use a data recovery software like Disk Drill to recover your lost files before reinstalling macOS. |
Choosing and Recovering a Startup Disk on Mac
To choose and recover a startup disk on your Mac without losing data, follow these steps:
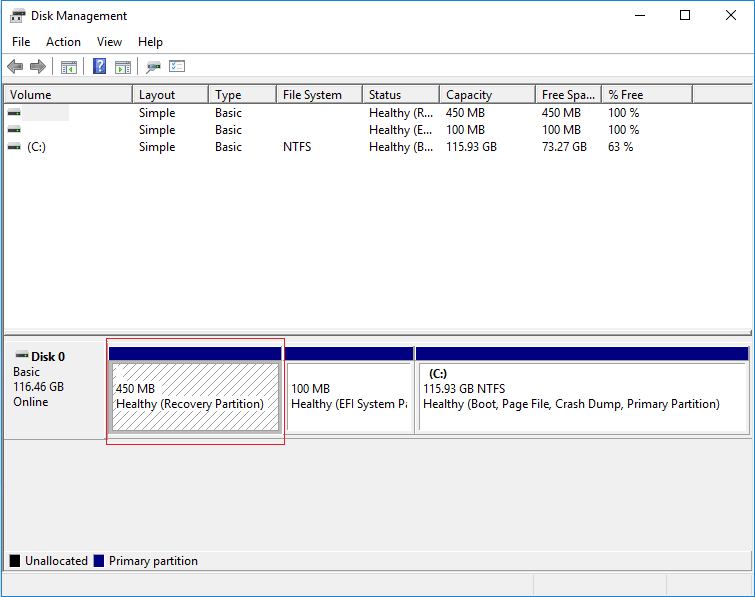
1. First, check if your Mac has a built-in recovery partition. To do this, restart your Mac and hold down Command (CMD) + R until the Apple logo appears. If the recovery partition is missing, you’ll see a question mark or folder icon instead.
2. If you don’t have a recovery partition, you can create a bootable installer using a website like ChrisWrites.com or the official Apple website.
3. To recover a deleted startup disk, use diskutil list Terminal to view all available partitions. Look for the one labeled Apple_Boot and note the identifier (e.g. disk0s2).
4. Use the identifier to create a new partition with the APFS Volume Recovery format.
5. If you’re still having troubles, try using workarounds such as booting in safe mode or using a different browser like Safari.
Remember, accidental losses and crashes can happen at any time, so it’s important to regularly back up your data to an external hard disk or cloud storage. With these tips and ideas, you can quickly recover your startup disk and get back to work or play.