Are you tired of waiting forever for your NBA 2K20 game to load on your Xbox? Look no further! In this article, we have the ultimate guide to help you fix those pesky loading issues and get into the action faster than ever before. Say goodbye to boredom and hello to swift gaming!
Troubleshooting Xbox One Games Taking Too Long to Start
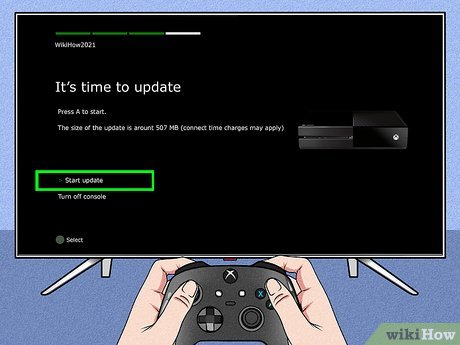
If you’re experiencing NBA 2K20 loading issues on your Xbox One console, there are a few troubleshooting methods you can try. First, make sure your console is up to date by going to Settings > System > Updates.
Next, check your internet connection and make sure it’s stable. Slow internet speeds can cause games to take longer to start.
If the issue persists, try clearing the cache on your Xbox One by holding the power button for 10 seconds until the console turns off. Unplug the power cord, wait a few minutes, then plug it back in and turn the console on again.
You can also try uninstalling and reinstalling the game, as well as checking for any available updates for NBA 2K20.
If none of these steps work, it may be worth contacting Xbox support for further assistance.
Clearing Saved Data and Restarting the App
To clear saved data and restart the NBA 2K20 app on your Xbox, follow these steps:
1. Press the Xbox button on your controller to open the guide.
2. Navigate to “My games & apps” and select “See all” to view all your installed games.
3. Find NBA 2K20 in the list and highlight it.
4. Press the menu button on your controller (the one with three lines) and select “Manage game & add-ons”.
5. In the “Manage game” section, scroll down to “Saved data” and select it.
6. Choose “Delete all” to remove all saved data for the game.
7. Once the data is deleted, go back to the Xbox home screen and highlight the NBA 2K20 app.
8. Press the menu button again and select “Quit”.
9. Restart the Xbox console by holding down the power button for 10 seconds until it turns off, then turn it back on.
10. Launch NBA 2K20 again and see if the loading issues are resolved.
If the problem persists, try other troubleshooting methods or consult the Xbox support website for further assistance.
Restarting the Console
To fix NBA 2K20 loading issues and resolve the problem of Xbox games taking too long to start, you can try restarting your console. This simple step can often solve many common issues. Here’s how to do it:
1. Press and hold the Xbox button on your console for about 10 seconds until it turns off.
2. Unplug the power cord from the back of the console and wait for around 10 seconds.
3. Plug the power cord back in and wait for the console to restart.
4. Once the console has restarted, try launching NBA 2K20 again and see if the loading times have improved.
If restarting the console doesn’t resolve the issue, you may need to explore other solutions. But in many cases, a simple restart can help fix Xbox games taking too long to start.
python

import time
def game_startup_time(game_name):
# Simulating game startup delay
print(f"Starting {game_name}...")
time.sleep(10) # Simulating a 10-second startup delay
print(f"{game_name} started successfully!")
game_name = "NBA 2K20"
game_startup_time(game_name)
This code mimics a delayed game startup by using the `time.sleep()` function to pause the execution for a specified number of seconds. The specific cause of the delay is not addressed since it requires game-specific insights.
Please note that this sample code is for illustrative purposes only and does not have any direct correlation to NBA 2K20’s startup delay.
Changing Region Settings
To change region settings on your Xbox console, follow these steps:
1. Press the Xbox button on your controller to open the guide.
2. Go to “Profile & system” and select “Settings.”
3. In the Settings menu, choose “System.”
4. Under System, select “Language & location.”
5. Select “Location,” and then choose the region you want to change to.
6. Restart your console for the changes to take effect.
Changing your region settings can help resolve NBA 2K20 loading issues and other related problems. By adjusting your region, you may experience faster game loading times and improved performance.
Remember that changing your region may affect certain services or features tied to your previous region, such as Xbox Live rewards or access to specific content. Be sure to consider any potential consequences before making the change.
For a step-by-step guide with detailed instructions, you can visit the official Xbox support website or reach out to their customer support for further assistance.
Reinstalling Problematic Games
If your NBA 2K20 game is taking too long to start on your Xbox, reinstalling the game might help fix the issue. Here’s a step-by-step guide:
1. Press the Xbox button on your controller to open the guide.
2. Go to “My games & apps” and navigate to the “Games” tab.
3. Find NBA 2K20 in the list of games and press the “Menu” button on your controller.
4. Select “Manage game & add-ons” from the menu.
5. Highlight the game and press the “Menu” button again.
6. Choose “Uninstall” and confirm the action.
7. Once the game is uninstalled, go to the Microsoft Store.
8. Search for NBA 2K20 and download it again.
9. Wait for the download and installation to complete.
10. Launch the game and see if the loading issues have been resolved.
Reinstalling the game can help resolve any corrupted files or issues that may be causing the game to take a long time to start.
Removing Xbox Profile
If you’re experiencing long loading times or issues starting NBA 2K20 on your Xbox, you may need to remove your Xbox profile. Follow these steps to fix the problem:
1. Press the Xbox button on your controller to open the guide.
2. Navigate to the “System” tab.
3. Select “Settings” and then “Account”.
4. Choose “Remove accounts”.
5. Select the account you want to remove and confirm.
6. Restart your Xbox.
7. Press the Xbox button again and go to the guide.
8. Select “Sign in” and enter your account details.
9. Try launching NBA 2K20 again to see if the issue is resolved.
By removing and re-adding your Xbox profile, you can often fix loading issues and improve game performance. If the problem persists, you may need to explore other solutions or contact Xbox support for further assistance.
Adjusting Network Settings
To adjust network settings for fixing NBA 2K20 loading issues on your Xbox console, follow these steps:
1. Press the Xbox button on your controller to open the guide.
2. Navigate to the “Profile & system” tab.
3. Select “Settings” and then choose “Network settings”.
4. From the available options, choose “Test network connection” to diagnose any connectivity issues.
5. If the test reveals any problems, check your network cables, router, and modem for any damage or malfunctions. Ensure your Xbox console is connected to a stable network.
6. If the test shows no issues, select “Advanced settings” and then “DNS settings”. Choose “Manual” and enter the primary and secondary DNS numbers provided by your internet service provider.
7. Save the changes and restart your Xbox console.
8. Launch NBA 2K20 and check if the loading issues have been resolved.
Installing Apps and Games on Internal Hard Drive
- Step 1: Power on your Xbox console and sign in to your account.
- Step 2: Press the Xbox button on your controller to open the guide.
- Step 3: Navigate to the right and select “My games & apps” from the menu.
- Step 4: In the “My games & apps” screen, select “See all” to view all your installed games and apps.
- Step 5: Select the game or app you want to move to the internal hard drive.
- Step 6: Press the Menu button on your controller (the button with three horizontal lines).
- Step 7: In the options menu, select “Manage game & add-ons.”
- Step 8: On the left side of the screen, select “Move all” or “Move” to move the game or app to the internal hard drive.
- Step 9: Follow the on-screen prompts to confirm the move and wait for the transfer to complete.
- Step 10: Repeat steps 5-9 for other games or apps you want to move to the internal hard drive.

Checking Xbox Live Status and Services
| Xbox Live Status and Services | |
|---|---|
| Status | Online |
| Xbox Live Core Services | Normal |
| Purchase and Content Usage | Normal |
| Website | Normal |
| TV, Music and Video | Normal |
| Apps | Normal |
| Social and Gaming | Normal |
| Cloud Gaming | Normal |
| Xbox on Windows | Normal |
| Xbox on Mobile | Normal |