Having trouble with your Windows 10 Ethernet connection and encountering the “Unidentified Network” error? Let’s find a solution.
Troubleshooting Windows Network Issues
If you are experiencing unidentified network issues on your Windows 10 Ethernet connection, there are a few troubleshooting steps you can try.
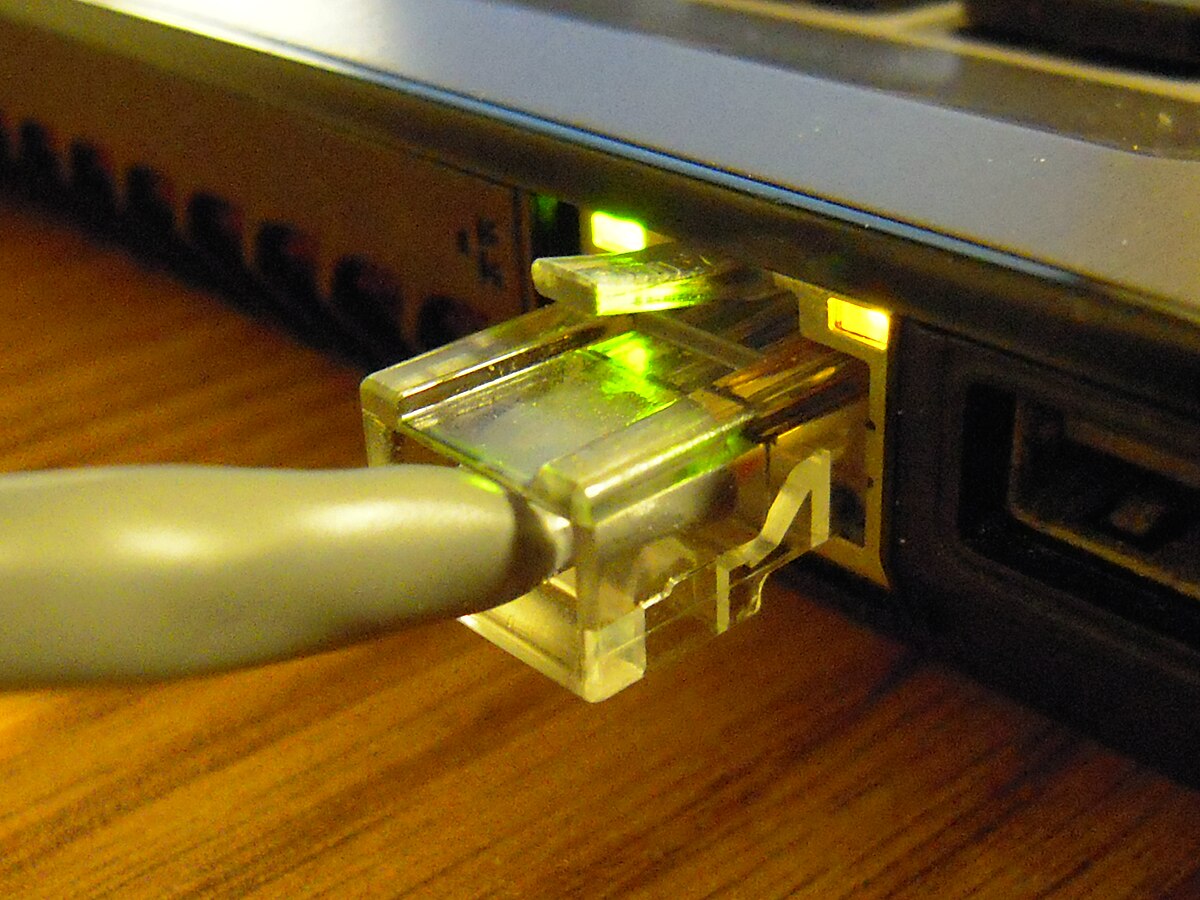
First, ensure that your Ethernet cable is securely plugged into both your computer’s Ethernet port and the router. If the cable appears to be loose or damaged, try using a different cable.
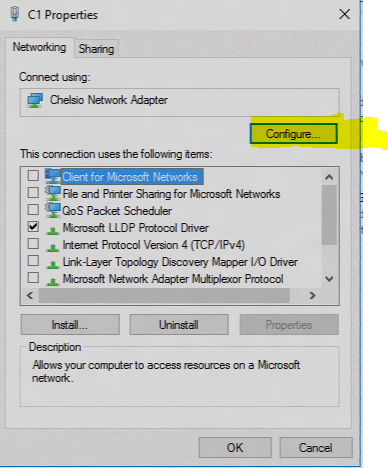
Next, check your network settings. Open the Control Panel and navigate to the Network and Sharing Center. From there, click on Change adapter settings. Right-click on your Ethernet connection and select Properties. Make sure that the “Internet Protocol Version 4 (TCP/IPv4)” is checked and click on Properties. Ensure that “Obtain an IP address automatically” and “Obtain DNS server address automatically” are selected. If they are not, make the necessary changes and click OK.
If the issue persists, you can try resetting the Winsock catalog. Open the Command Prompt as an administrator and type the following command: netsh winsock reset. Press Enter and restart your computer.
Another possible solution is to update your network adapter driver. Right-click on the Start button and select Device Manager. Expand the Network adapters category, right-click on your Ethernet adapter, and select Update driver. Follow the on-screen instructions to complete the update.
Advanced Network Settings Configuration
- Open Command Prompt as an administrator.
- Type the command netsh int ip reset and press Enter.
- Wait for the command to complete and then restart your computer.
Repair Method 2: Release and Renew IP Configuration
- Open Command Prompt as an administrator.
- Type the command ipconfig /release and press Enter.
- Wait for the command to complete and then type ipconfig /renew and press Enter.
- Restart your computer and check if the issue is resolved.
Repair Method 3: Update Network Adapter Driver
- Open Device Manager by pressing Win+X and selecting Device Manager from the menu.
- Expand the Network Adapters category.
- Right-click on your network adapter and select Update driver.
- Choose Search automatically for updated driver software and follow the on-screen instructions.
- Restart your computer and check if the issue is resolved.
Repair Method 4: Disable IPv6
- Open Control Panel by pressing Win+X and selecting Control Panel from the menu.
- Click on Network and Internet, then select Network and Sharing Center.
- Click on your Ethernet connection.
- In the new window, click on Properties.
- Uncheck the box next to Internet Protocol Version 6 (TCP/IPv6).
- Click OK to save the changes and restart your computer.
Updating Network Drivers
To resolve the issue of an unidentified network in Windows 10 Ethernet, updating the network drivers can often be an effective solution. Outdated or incompatible drivers can cause connectivity problems and prevent your computer from properly identifying the network.
Here’s how you can update your network drivers:
1. Press the Windows key + X and select Device Manager from the list.
2. In the Device Manager window, expand the Network adapters category.
3. Right-click on your Ethernet adapter and select Update driver.
4. Choose the option to search automatically for updated driver software.
5. Windows will search for the latest driver online and install it if available.
6. Restart your computer to apply the changes.
Updating your network drivers can help resolve network identification issues and improve overall connectivity. Make sure to regularly check for driver updates to keep your system running smoothly.
Resolving DHCP IP Address Errors
If you are experiencing DHCP IP address errors on your Windows 10 Ethernet network, here are some steps to resolve the issue.
1. Check your network cable: Ensure that the Ethernet cable is properly connected to your computer and the router or modem. If necessary, try using a different cable to eliminate the possibility of a faulty connection.
2. Restart your network devices: Power off your computer, router, and modem. Wait for a few seconds, then power them back on. This can help refresh the network settings and resolve any temporary issues.
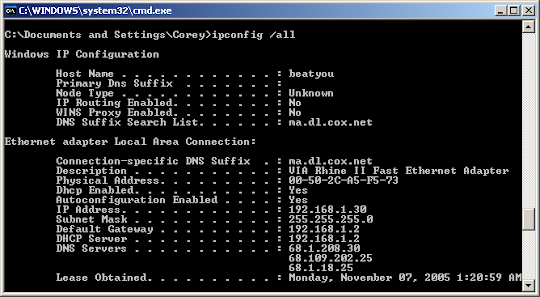
3. Release and renew IP address: Press the Windows key + R to open the Run dialog box. Type “cmd” and press Enter to open the Command Prompt. In the Command Prompt window, type “ipconfig/release” and press Enter. Then, type “ipconfig/renew” and press Enter. This will release and renew your IP address, potentially resolving DHCP errors.
4. Disable and enable network adapter: Press the Windows key + X and select “Device Manager” from the menu. Expand the “Network adapters” section, right-click on your Ethernet adapter, and select “Disable”. Wait for a few seconds, then right-click again and select “Enable”. This will reset the network adapter and may fix DHCP IP address errors.
5. Update network adapter driver: Open the Device Manager as mentioned in the previous step. Right-click on your Ethernet adapter and select “Update driver”. Choose the option to search automatically for updated driver software. If an updated driver is found, follow the on-screen instructions to install it. Outdated or incompatible drivers can cause DHCP issues.
6. Reset TCP/IP stack: Open the Command Prompt as administrator by right-clicking on the Start button and selecting “Command Prompt (Admin)”. In the Command Prompt window, type “netsh int ip reset” and press Enter. Restart your computer after the process completes. This will reset the TCP/IP stack and can help resolve DHCP IP address errors.
Checking Router Network Configuration
| Step | Description |
|---|---|
| Step 1 | Connect your Windows 10 device to the router using an Ethernet cable. |
| Step 2 | Open the Start menu and click on “Settings”. |
| Step 3 | Select “Network & Internet” from the settings menu. |
| Step 4 | In the Network & Internet settings, click on “Ethernet” on the left-hand side. |
| Step 5 | Under Ethernet, click on “Change adapter options”. |
| Step 6 | A new window will open, displaying the network connections on your device. Right-click on the Ethernet connection and select “Properties”. |
| Step 7 | In the Ethernet Properties window, scroll down and find “Internet Protocol Version 4 (TCP/IPv4)”. Select it and click on the “Properties” button below. |
| Step 8 | Make sure the settings are configured to “Obtain an IP address automatically” and “Obtain DNS server address automatically”. |
| Step 9 | If the settings were already correct, try restarting your router and Windows 10 device. |
| Step 10 | If the issue still persists, you may need to contact your Internet Service Provider or check for any firmware updates for your router. |
Verifying Internet Protocol Properties
To verify Internet Protocol properties on Windows 10 Ethernet, follow these steps:
1. Open the “Control Panel” on your computer.
2. Click on “Network and Internet”.
3. Select “Network and Sharing Center”.
4. On the left-hand side, click on “Change adapter settings”.
5. Right-click on your Ethernet connection and select “Properties”.
6. In the properties window, scroll down and select “Internet Protocol Version 4 (TCP/IPv4)”.
7. Click on the “Properties” button.
8. Ensure that the “Obtain an IP address automatically” option is selected.
9. Also, make sure that the “Obtain DNS server address automatically” option is selected.
10. If you need to manually set an IP address or DNS server, select the “Use the following IP address” or “Use the following DNS server addresses” option respectively, and enter the required details.
11. Click “OK” to save the changes.
Firewall and Windows Defender Check
![]()
To solve the “Unidentified Network” issue on Windows 10 Ethernet, it is important to check your firewall and Windows Defender settings. These security features can sometimes interfere with network connections.
To check your firewall settings, follow these steps:
1. Open the Windows Defender Security Center.
2. Click on “Firewall & network protection.”
3. Ensure that the firewall is turned on.
4. Check the firewall settings for any rules that may be blocking your network connection.
5. If necessary, create a new rule to allow the network connection.
Next, check your Windows Defender settings:
1. Open the Windows Defender Security Center.
2. Click on “Virus & threat protection.”
3. Ensure that the Real-time protection is turned on.
4. Check the settings to see if any network-related issues are being blocked or flagged.
If you have any third-party antivirus software installed, it is recommended to temporarily disable it and check if the “Unidentified Network” issue persists.
Router and Connector Inspection
To troubleshoot the “Unidentified Network” issue in Windows 10 Ethernet, it is important to inspect the router and connectors. Here are some steps to follow:
1. Check the physical connections: Ensure that the Ethernet cable is securely plugged into both the router and the computer’s Ethernet port. If using a Wi-Fi connection, make sure it is connected properly.
2. Restart the router: Sometimes, a simple router restart can resolve connectivity issues. Unplug the power cable from the router, wait for a few seconds, and then plug it back in. Wait for the router to fully restart before proceeding.
3. Check the router settings: Access the router’s settings page by typing its IP address into a web browser. Look for any settings related to network configuration, DHCP, or DNS. Make sure they are properly configured.
4. Update router firmware: Outdated router firmware can cause compatibility issues. Visit the manufacturer’s website to check for any available firmware updates. If updates are available, follow the instructions provided to update the firmware.
5. Inspect the Ethernet cable: Check for any visible damage or fraying on the Ethernet cable. If there are any signs of damage, replace the cable with a new one.
6. Test with a different cable and port: If possible, try connecting the computer to the router using a different Ethernet cable and port. This will help determine if the issue lies with the cable or port.
7. Restart the computer: A simple restart can sometimes resolve network connectivity issues. Restart the computer and check if the “Unidentified Network” issue persists.
Remember to always consult the router’s user manual or contact the manufacturer’s support for specific instructions related to your router model.
Using Windows Troubleshooter

1. First, click on the network icon in the system tray on the taskbar.
2. Select “Open Network & Internet settings” from the options.
3. In the Settings window, click on the “Network Troubleshooter” option.
4. The troubleshooter will start diagnosing and detecting any network issues.
5. Follow the instructions provided by the troubleshooter to fix the problem.
6. If the troubleshooter is unable to resolve the issue, try resetting the network adapter.
7. Go to the Control Panel and select “Network and Internet” followed by “Network and Sharing Center.”
8. Click on “Change adapter settings” on the left side of the window.
9. Right-click on your Ethernet connection and select “Disable.” Wait for a few seconds and then right-click again and select “Enable.”
10. Check if the issue is resolved. If not, try updating the network driver.
11. Open the Device Manager by right-clicking on the Start button and selecting it from the menu.
12. Expand the “Network adapters” category and right-click on your Ethernet adapter.
13. Select “Update driver” and follow the on-screen instructions to update the driver.
14. Restart your computer and check if the issue is resolved.
15. If the problem persists, you may need to contact your network administrator or Internet service provider for further assistance.
By using the Windows Troubleshooter and following these steps, you should be able to resolve the “Red no identificada” issue on your Windows 10 Ethernet connection.
Resetting Network Protocols
To reset network protocols in Windows 10 Ethernet, follow these steps:
1. Open the Start menu and type “Control Panel” in the search bar.
2. Click on the Control Panel app to open it.
3. In the Control Panel, select “Network and Internet” and then click on “Network and Sharing Center.”
4. Under the “View your active networks” section, click on the “Ethernet” connection.
5. In the Ethernet Status window, click on the “Properties” button.
6. Scroll down and find the “Internet Protocol Version 4 (TCP/IPv4)” option.
7. Select it and then click on the “Properties” button.
8. In the TCP/IPv4 Properties window, click on the “Obtain an IP address automatically” and “Obtain DNS server address automatically” options.
9. Click on the “OK” button to save the changes.
10. Back in the Ethernet Status window, click on the “Disable” button to temporarily disable the Ethernet connection.
11. Wait for a few seconds and then click on the “Enable” button to re-enable the Ethernet connection.
12. Close all the windows and restart your computer.
This process will reset the network protocols for your Windows 10 Ethernet connection, which may help resolve any unidentified network issues you are experiencing.
Utilizing Ethernet Cable Connection
To utilize Ethernet cable connection on Windows 10 and resolve the “Unidentified Network” issue, follow these steps:
1. Check the Ethernet cable: Make sure the cable is securely plugged into your computer’s Ethernet port and the router or modem.
2. Restart your computer and network devices: Sometimes, a simple restart can resolve connectivity issues. Restart your computer, router, and modem.
3. Update network drivers: Outdated or incompatible network drivers can cause network problems. Open the Device Manager, locate the network adapter, right-click on it, and select “Update driver.” Alternatively, you can download the latest drivers from the manufacturer’s website.
4. Disable and re-enable the network adapter: Open the Device Manager, find the network adapter, right-click on it, and choose “Disable.” Wait for a few seconds, then right-click again and select “Enable.”
5. Reset TCP/IP stack: Open Command Prompt as an administrator and type the following commands one by one:
netsh winsock reset
netsh int ip reset
Restart your computer after executing the commands.
6. Disable IPv6: Sometimes, disabling IPv6 can help resolve network issues. Open Network and Sharing Center, click on your connection, select “Properties,” and uncheck the “Internet Protocol Version 6 (TCP/IPv6)” box.
7. Disable proxy settings: Open the Settings app, go to Network & Internet, select Proxy, and turn off the “Use a proxy server” toggle switch.
8. Check firewall settings: Ensure that your firewall is not blocking the network connection. Open Windows Security or your third-party firewall software and review the settings.
Disabling Antivirus and Firewall
To resolve the “Unidentified Network” issue on Windows 10 Ethernet, you may need to disable your antivirus and firewall temporarily. These security programs can sometimes interfere with network connections and cause this problem. Here’s how you can do it:
1. Open your antivirus software and locate the settings or preferences section. Look for options related to real-time protection or firewall.
2. Disable real-time protection or turn off the firewall feature temporarily. This will vary depending on the antivirus software you’re using.
3. Once disabled, go to the Windows Taskbar and right-click on the network icon. Select “Open Network & Internet settings.”
4. In the Settings window, click on “Change adapter options” under the “Change your network settings” section.
5. Right-click on your Ethernet connection and select “Disable.” Wait for a few seconds and then right-click again and select “Enable.” This will reset your network connection.
6. If the issue persists, you can also try resetting the TCP/IP stack. Open the Command Prompt as an administrator and type the following commands, pressing Enter after each one:
– netsh winsock reset
– netsh int ip reset
7. Restart your computer and check if the “Unidentified Network” problem is resolved.
Analyzing VPN and Proxy Settings
When troubleshooting the “Red no identificada Windows 10 Ethernet” issue, it’s important to analyze your VPN and proxy settings. These settings can sometimes interfere with your network connection and cause the unidentified network error.
To start, check your VPN settings. If you have a VPN enabled, temporarily disable it and see if the issue persists. Sometimes, VPN configurations can conflict with your network settings, resulting in the unidentified network problem.
Next, examine your proxy settings. Proxy servers can also disrupt your network connection and lead to the “Red no identificada” error. Open your browser’s settings and navigate to the proxy settings. Disable any proxy configurations and test your network connection again.
If you’re unsure how to access or modify these settings, follow these steps:
1. Open your preferred web browser.
2. Click on the menu button (usually represented by three dots or lines) in the top right corner of the browser window.
3. Select “Settings” from the drop-down menu.
4. Scroll down and click on “Advanced” or “More” options.
5. Look for the “Proxy” or “Network” settings and click on it.
6. Disable any active proxy configurations or switch to “No proxy” option.
7. Save the changes and restart your computer.
By analyzing and adjusting your VPN and proxy settings, you can potentially resolve the “Red no identificada Windows 10 Ethernet” issue and regain a stable network connection.