Is your computer refusing to power down? Fear not, for we have compiled eight ingenious solutions to help you tackle this frustrating issue. So, bid farewell to never-ending shutdown processes as we reveal the secrets to restoring harmony to your device’s power button.
Troubleshooting Methods for Windows Not Shutting Down
If your computer won’t shut down, here are 8 solutions to help you fix the issue:
1. Check Power Cables and Settings: Make sure all power cables are connected properly and check your power settings to ensure they allow for shutdown.
2. Update Device Drivers: Outdated or incompatible drivers can cause shutdown problems. Use a reliable driver update tool like Driver Easy to update your drivers.
3. Disable Fast Startup: Fast Startup is a feature that can interfere with shutdown. Disable it by following these steps: Control Panel > Power Options > Choose what the power buttons do > Change settings that are currently unavailable > Uncheck “Turn on fast startup”.
4. Change Boot Order: Incorrect boot order can prevent shutdown. Access your system’s BIOS/UEFI settings and change the boot order to prioritize the system startup.
5. Check for Windows Updates: Installing the latest Windows updates can fix issues related to shutdown. Go to Settings > Update & Security > Windows Update > Check for updates.
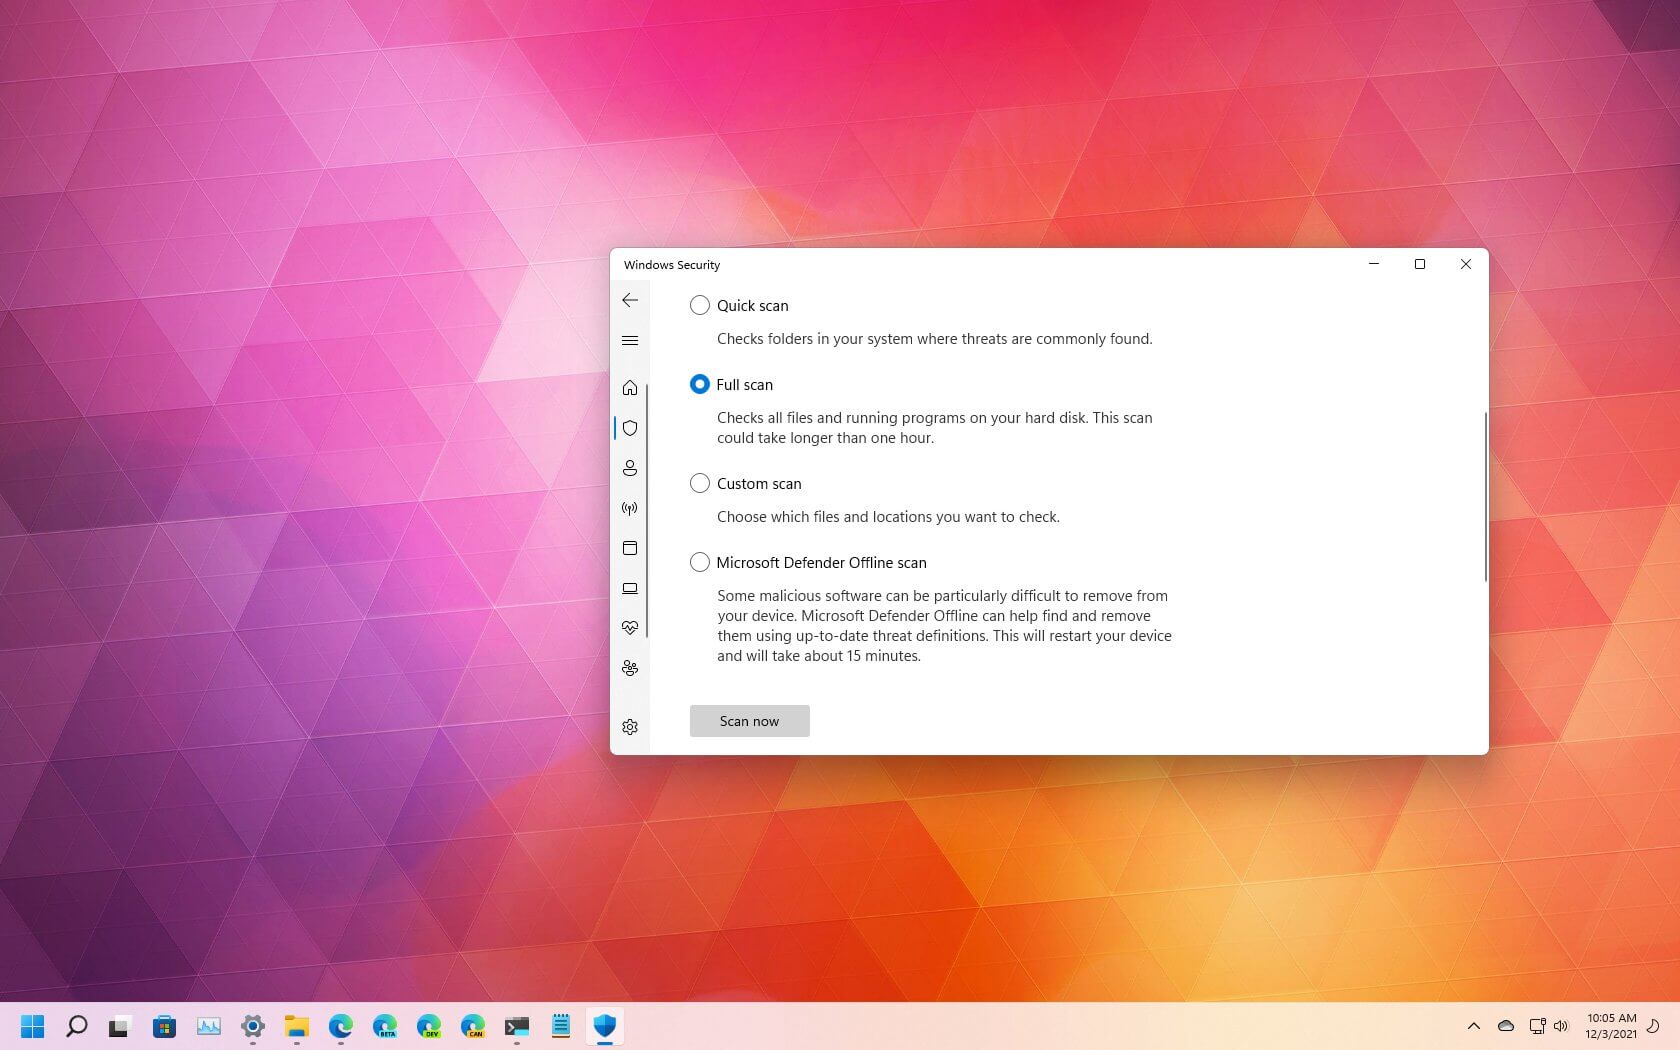
6. Scan for Malware: Malware infections can disrupt normal system functions. Use a reliable antivirus software to scan your computer for malware and remove any threats.
7. Perform a System Restore: If the problem started after a recent change, perform a system restore to revert your computer back to a previous working state.
8. Seek Professional Help: If none of the above solutions work, it’s recommended to contact Microsoft support or a professional technician for further assistance.
Disabling Fast Startup for Windows Shutdown Issues
To fix Windows shutdown issues, one solution is to disable Fast Startup. This feature can sometimes cause problems when shutting down your PC.
To disable Fast Startup, follow these steps:
1. Open the Start menu and type “Control Panel.” Click on the Control Panel app to open it.
2. In the Control Panel, click on “Power Options.”
3. On the left-hand side, click on “Choose what the power buttons do.”
4. Click on “Change settings that are currently unavailable.”
5. Scroll down to the “Shutdown settings” section and uncheck the box next to “Turn on fast startup.”
6. Click on “Save changes” to apply the settings.
Disabling Fast Startup can help resolve shutdown issues on Windows 10 and other versions. If this doesn’t work, there are other troubleshooting steps you can try.
Performing a Full Shutdown to Resolve Computer Shutdown Problems
If your computer is experiencing shutdown problems, performing a full shutdown can help resolve the issue. Here are the steps to follow:
1. Press the Windows key and select Power from the Start menu.
2. Click on Shut down to initiate a regular shutdown.
3. Once the computer is completely turned off, press the power button to turn it back on.
4. Check if the shutdown problem has been resolved.
Performing a full shutdown can help refresh the system and clear any temporary errors or conflicts that may be causing the issue. If the problem persists, you can try other solutions mentioned in the article to fix the shutdown problem.
Remember to consult the power settings on your computer and ensure they are configured correctly. Additionally, make sure your device drivers are up to date, as outdated drivers can sometimes lead to shutdown problems.
For more detailed instructions and additional fixes, please refer to the full article.
python

import os
def check_shutdown_issue():
try:
# Attempt to shut down the computer
os.system("shutdown /s /t 0")
except Exception as e:
print(f"Error occurred: {e}")
else:
print("Computer is shutting down...")
# Call the function to check the shutdown issue
check_shutdown_issue()
Please note that this code attempts to shut down the computer using the command `shutdown /s /t 0` on Windows systems. It catches any exceptions that may occur during the shutdown process and prints an error message if necessary. However, it’s important to use caution when running code related to system operations, especially if you are not familiar with the code’s source or purpose.
It is always recommended to consult with a professional or refer to official documentation when troubleshooting system-related issues to ensure the safety and security of your computer.
Running Windows Update Troubleshooter for Shutdown Errors
Running Windows Update Troubleshooter can help resolve shutdown errors on your Windows PC. Here’s how to do it:
1. Press the Windows key + I to open the Settings app.
2. Click on “Update & Security” and then select “Troubleshoot” from the left panel.
3. Scroll down and click on “Additional troubleshooters”.
4. Click on “Windows Update” and then click on “Run the troubleshooter”.
5. Follow the on-screen instructions to complete the troubleshooting process.
This troubleshooter will automatically detect and fix any issues with Windows Update that may be causing shutdown errors on your computer. Once the troubleshooting is complete, try shutting down your PC again to see if the issue is resolved.
If this solution doesn’t work, don’t worry. There are other fixes you can try.
Changing BIOS Settings to Fix Shutdown Problems
To change BIOS settings and resolve shutdown problems, follow these steps:
1. Boot your PC and press the designated key (usually Del, F2, or Esc) to enter the BIOS menu. If you’re unsure, refer to your device’s manual or the manufacturer’s website.
2. In the BIOS menu, locate the “Boot” or “Startup” tab, and navigate to “Boot Order” or “Boot Sequence.”
3. Use the arrow keys to highlight the primary boot device, usually your hard drive, and press Enter.
4. Select any secondary boot devices, such as a CD/DVD drive or USB, if needed.
5. Save the changes and exit the BIOS menu. Your PC will restart.
6. Test the shutdown functionality. If the issue persists, proceed to the next solution.
Restoring Lost Data After a Force Shutdown
If you’ve experienced a force shutdown and lost data, don’t panic. There are a few steps you can take to potentially recover your lost files.
1. Use a Data Recovery Software: Utilize a reliable data recovery software like EaseUS to scan your computer and retrieve lost files.
2. Check the Recycle Bin: Sometimes, files may be mistakenly deleted and end up in the Recycle Bin. Restore them from there if applicable.
3. Restore from a Backup: If you have a recent backup of your files, restore them from the backup source.
4. Consult a Professional: If none of the above methods work, consider seeking professional help from a data recovery specialist.
Additional Fixes for Random Restart or Shutdown Issues
- Disable Automatic Restart:
- Open the Control Panel by searching for it in the Start Menu.
- Click on System and Security.

- Select System.
- Click on Advanced system settings located on the left-hand side.
- In the System Properties window, under the Startup and Recovery section, click on the Settings button.
- Uncheck the box next to Automatically restart under the System Failure section.
- Click OK to save the changes.
- Check for Overheating:
- Make sure the computer is turned off and unplugged from the power source.
- Clean any dust or debris from the vents and fans using compressed air or a soft brush.
- Check if all fans are functioning properly. Replace any faulty fans if necessary.
- Ensure that the computer is placed on a hard, flat surface to allow proper airflow.
- Consider using a laptop cooling pad or an additional fan to prevent overheating.
- Plug the computer back in and turn it on to see if the issue persists.
- Update Device Drivers:
- Press Windows Key + X and select Device Manager.
- In the Device Manager window, expand the categories and look for any devices with a yellow exclamation mark, indicating a driver issue.
- Right-click on the device with the exclamation mark and select Update driver.
- Choose the option to Search automatically for updated driver software.
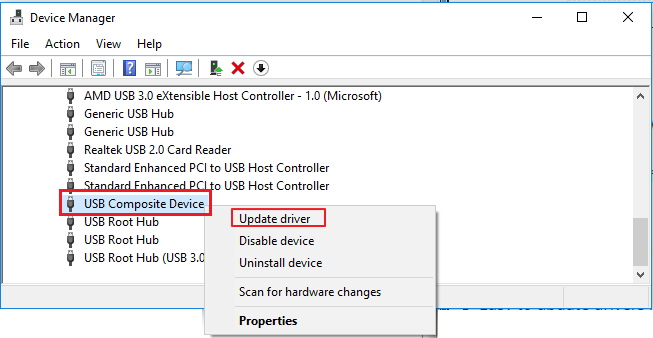
- Follow the on-screen instructions to update the driver.
- Repeat this process for all devices with driver issues.
- Restart the computer to see if the problem is resolved.
- Scan for Malware:
- Install and update a reliable antivirus software.
- Perform a full system scan to detect and remove any malware or viruses.
- Quarantine or delete any malicious files found during the scan.
- Restart the computer and check if the issue persists.
Frequently Asked Questions About Windows Shutdown Problems
- Step 1: Open Task Manager by pressing Ctrl+Shift+Esc
- Step 2: Go to the Processes tab

- Step 3: Look for any unresponsive or high CPU usage programs
- Step 4: Right-click on the program and select End Task
- Step 5: Repeat this process for any other conflicting programs
Repair Step 2: Update Windows
- Step 1: Press the Windows key and type Windows Update
- Step 2: Select Windows Update Settings
- Step 3: Click on Check for updates
- Step 4: Install any available updates
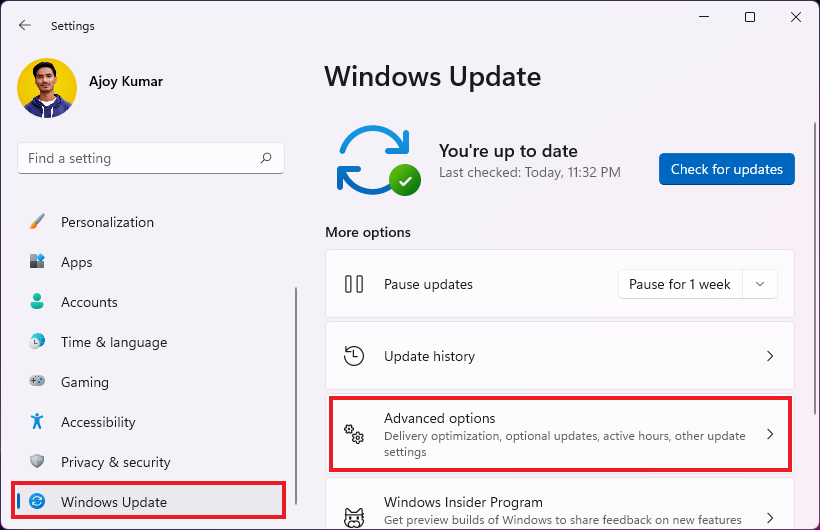
- Step 5: Restart your computer and check if the shutdown problem is resolved
Repair Step 3: Perform a Clean Boot
- Step 1: Press the Windows key and type msconfig
- Step 2: Select System Configuration from the search results
- Step 3: Go to the Services tab
- Step 4: Check the box that says Hide all Microsoft services
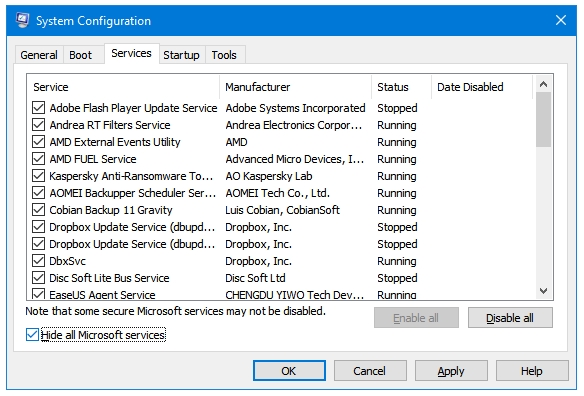
- Step 5: Click on Disable all
- Step 6: Go to the Startup tab
- Step 7: Click on Open Task Manager
- Step 8: Disable each startup item by right-clicking and selecting Disable
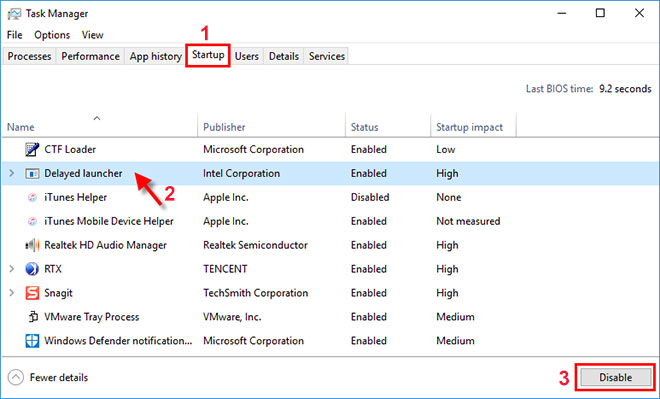
- Step 9: Close the Task Manager
- Step 10: Go back to the System Configuration window and click OK
- Step 11: Restart your computer and check if the shutdown problem is resolved
Repair Step 4: Check Power Settings
- Step 1: Press the Windows key and type Power Options
- Step 2: Select Power Options from the search results
- Step 3: Click on Choose what the power buttons do
- Step 4: Click on Change settings that are currently unavailable
- Step 5: Uncheck the box that says Turn on fast startup
- Step 6: Click on Save changes
- Step 7: Restart your computer and check if the shutdown problem is resolved
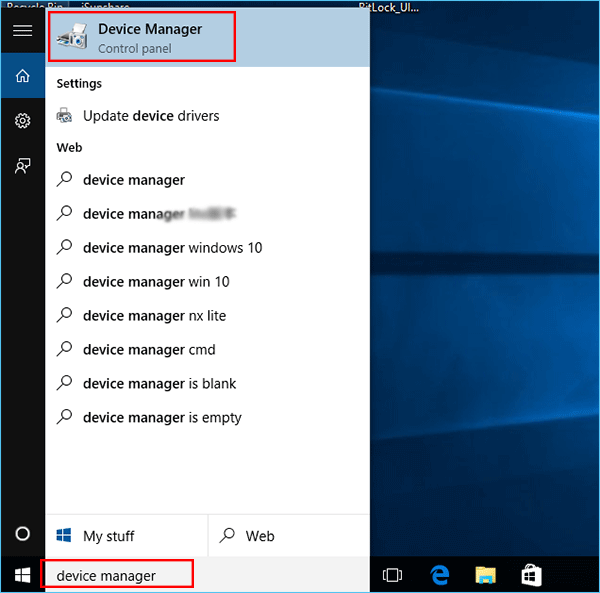
Repair Step 5: Update Device Drivers
- Step 1: Press the Windows key and type Device Manager
- Step 2: Select Device Manager from the search results
- Step 3: Expand the categories and look for any devices with a yellow exclamation mark or red X
- Step 4: Right-click on the device and select Update driver
- Step 5: Choose the option to Search automatically for updated driver software
- Step 6: Follow the on-screen instructions to install the updated driver
- Step 7: Repeat this process for any other devices with driver issues
- Step 8: Restart your computer and check if the shutdown problem is resolved
Repair Step 6: Run System File Checker
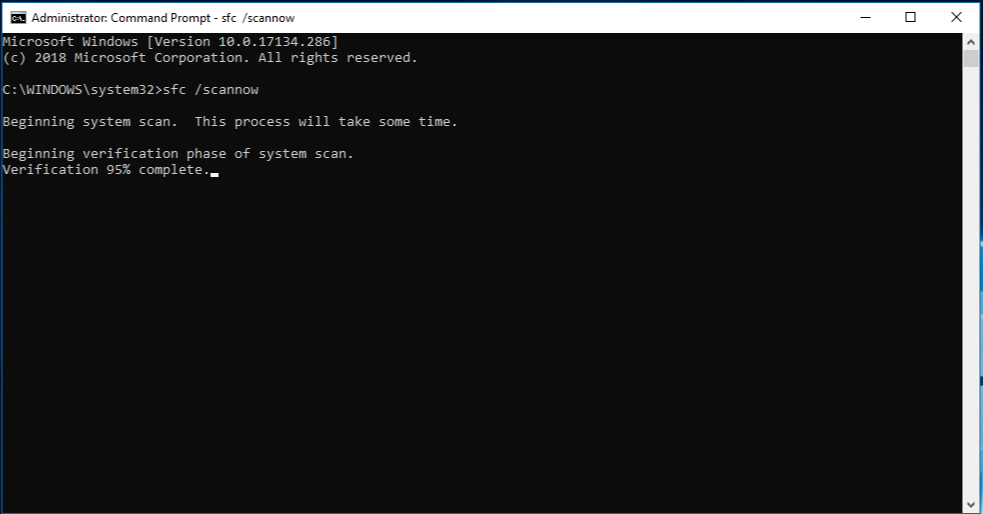
- Step 1: Press the Windows key and type Command Prompt
- Step 2: Right-click on Command Prompt and select Run as administrator
- Step 3: Type sfc /scannow and press Enter
- Step 4: Wait for the scan to complete (this may take some time)
- Step 5: If any issues are found, the System File Checker will attempt to fix them automatically
- Step 6: Restart your computer and check if the shutdown problem is resolved
Repair Step 7: Disable Fast Startup
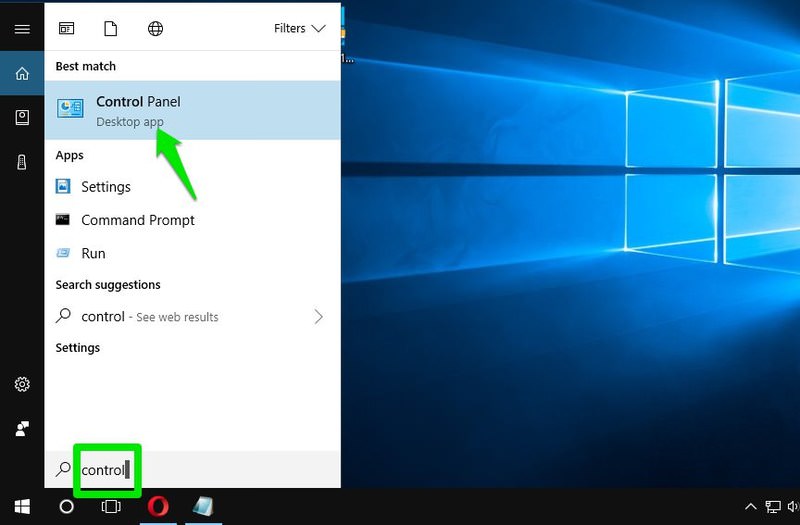
- Step 1: Press the Windows key and type Control Panel
- Step 2: Select Control Panel from the search results
- Step 3: Click on Power Options
- Step 4: Click on Choose what the power buttons do
- Step 5: Click on Change settings that are currently unavailable
- Step 6: Uncheck the box that says Turn on fast startup
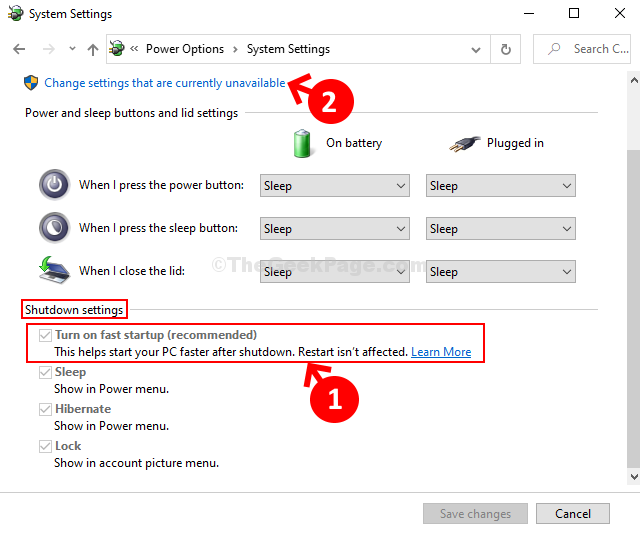
- Step 7: Click on Save changes
- Step 8: Restart your computer and check if the shutdown problem is resolved
Repair Step 8: Check for Malware
- Step 1: Install a reputable antivirus or anti-malware software
- Step 2: Update the software to the latest version
- Step 3: Run a full system scan
- Step 4: Follow the software’s instructions to remove any detected malware
- Step 5: Restart your computer and check if the shutdown problem is resolved