Are you tired of your Android device constantly struggling to acquire an IP address? Look no further! In this article, we will dive into the common causes behind this frustrating issue and provide you with effective troubleshooting solutions. Get ready to effortlessly connect to your Wi-Fi network without any setbacks!
Troubleshooting Methods for Acquiring IP Address Issues
If you’re experiencing issues with acquiring an IP address on your Android device, here are some troubleshooting methods to help you resolve the problem:
1. Check your Wi-Fi network: Ensure that you’re within range of the Wi-Fi signal and that there are no physical obstacles blocking the signal.
2. Reset network settings: On your Android device, go to Settings > System > Reset > Reset Wi-Fi, mobile, and Bluetooth. This will clear any network configuration issues.
3. Restart your device: Sometimes a simple restart can fix connectivity problems. Turn off your device, wait a few seconds, and then turn it back on.
4. Update network drivers: Outdated or malfunctioning network drivers can cause IP address issues. Visit the manufacturer’s website for your device and download the latest drivers.
5. Try a different Wi-Fi network: Connect to a different Wi-Fi network to see if the issue persists. This will help determine if the problem is specific to your network or device.
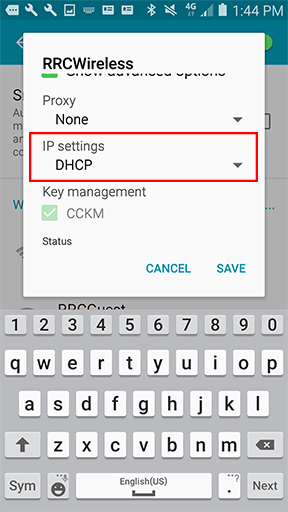
6. Use static IP address: If you’re unable to acquire an IP address automatically, you can manually set a static IP address. Go to Settings > Wi-Fi > Long press on your network > Modify network > Advanced options > Change IP settings to Static.
Remember, if you’re using a VPN or Cisco AnyConnect Secure Mobility Client, these may also affect your IP address acquisition. Ensure that the settings are configured correctly and try disabling them temporarily to see if it resolves the issue.
If you’re still experiencing issues after trying these troubleshooting methods, it may be helpful to seek further assistance from a technical expert or your network administrator.
Resolving “Failed to Obtain IP Address” Error on Windows and Android
If you are experiencing a “Failed to Obtain IP Address” error on your Windows or Android device, follow these steps to resolve the issue:
1. Restart your router and device. This can often fix temporary network glitches.
2. Check your Wi-Fi settings on your device. Make sure you are connected to the correct network and that the Wi-Fi is enabled.
3. Reset your network settings. On Windows, press the Windows key + R, type “cmd,” and press Enter. Then, type “ipconfig /release” and “ipconfig /renew” in the Command Prompt window. On Android, go to Settings > Network & internet > Wi-Fi > Wi-Fi preferences > Advanced > Reset Wi-Fi, mobile & Bluetooth.
4. Update your network adapter driver. Go to the manufacturer’s website and download the latest driver for your network adapter.
5. Disable any VPN or security software that may be causing conflicts with your network settings.
6. If the issue persists, contact your network administrator or Internet service provider for further assistance.
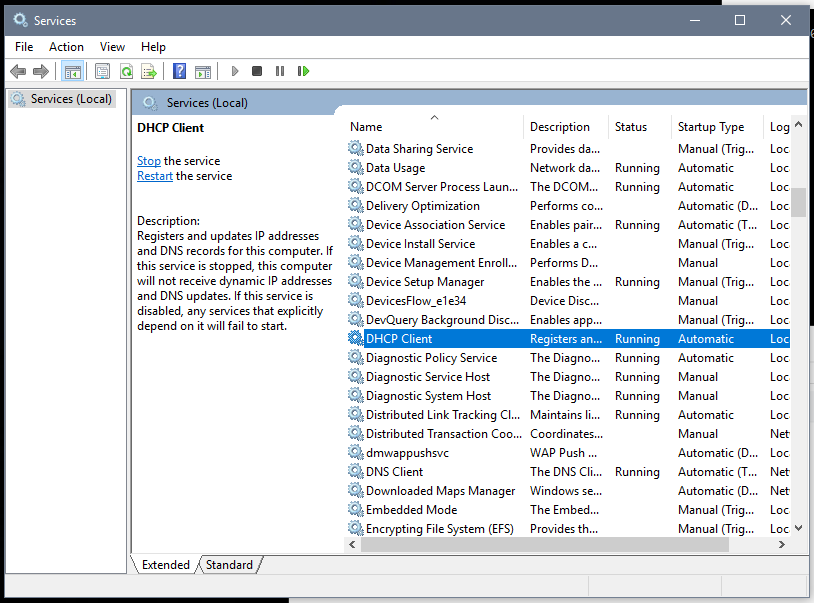
Updating Network Drivers and Troubleshooting DHCP Client
- Update network drivers: Ensure that you have the latest network drivers installed on your Android device.
- Troubleshoot DHCP client:
- Restart DHCP client service: Restart the DHCP client service to resolve any issues related to acquiring an IP address.
- Check network settings:
- Verify if DHCP is enabled:
- Access Settings: Navigate to the Settings menu on your Android device.
- Locate Wi-Fi settings: Find and tap on the Wi-Fi settings option.
- Check DHCP settings: Ensure that DHCP is enabled for the network you are trying to connect to.
- Forget and reconnect to the network: Remove the network from your device’s saved networks list and reconnect to it.
- Reset network settings: Resetting your network settings can help resolve DHCP-related issues.
- Restart your Android device: A simple restart can sometimes fix acquiring IP address problems.
- Try a different Wi-Fi network: Connect to a different Wi-Fi network to determine if the issue is specific to a particular network.
- Perform a factory reset: As a last resort, consider performing a factory reset on your Android device to resolve persistent acquiring IP address issues.
python

import socket
def get_ip_address():
# Create a socket object
sock = socket.socket(socket.AF_INET, socket.SOCK_DGRAM)
try:
# Connect to a remote server (Google DNS)
sock.connect(("8.8.8.8", 80))
# Get the local IP address
ip_address = sock.getsockname()[0]
return ip_address
except socket.error as e:
print("Failed to get IP address:", e)
finally:
sock.close()
# Call the function to get the IP address
ip_address = get_ip_address()
print("IP Address:", ip_address)
In the code above, we create a socket object using the `socket` library. Then, we connect to a remote server (in this case, Google DNS) to obtain the local IP address. Finally, we print the acquired IP address.
Solutions for IP Configuration Failure and Obtaining IP Address Error
1. Ensure you are within range of your wireless router. Check for any physical obstructions or distance limitations that may be causing connectivity issues.
2. Restart your Android device and try connecting to the network again.
3. Reset your router by unplugging it for 30 seconds and then plugging it back in.
4. Check if other devices on the network are experiencing similar issues. If so, there may be a problem with the router itself.
5. Try forgetting the network on your Android device and then reconnecting to it.
6. If you are using a Cisco AnyConnect Secure Mobility Client, make sure it is properly configured and up to date.
7. If all else fails, contact your network administrator or Internet service provider for further assistance.